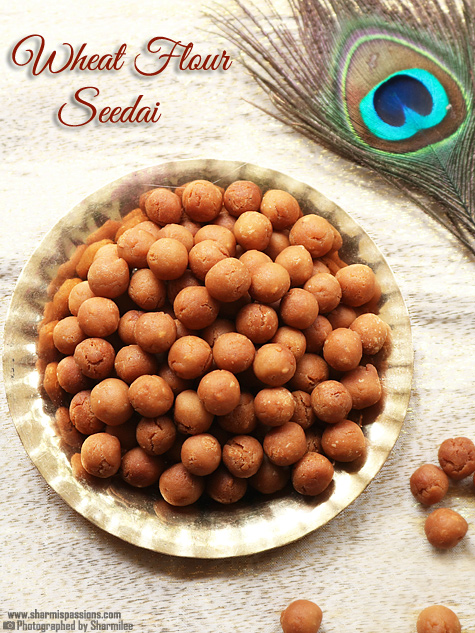
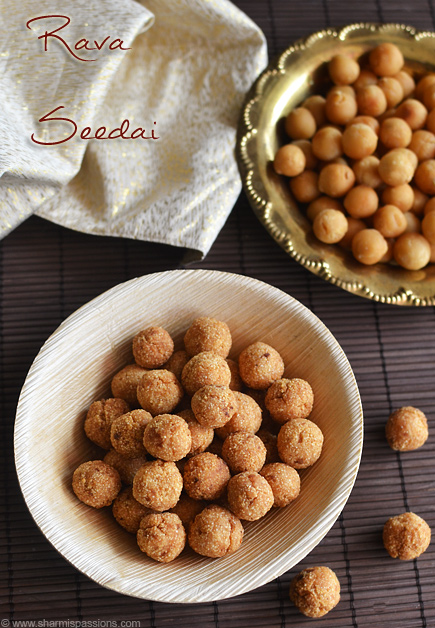
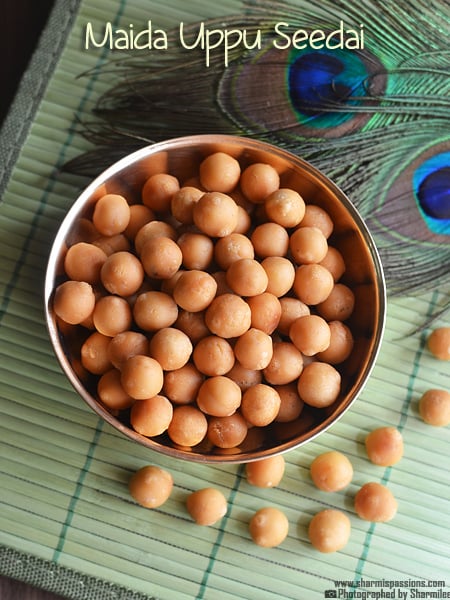
Seedai is a crispy snack offered to Lord Krishna in the auspicious occasion of Gokulashtami. Uppu Seedai is the salt version of seedai, a crispy and crunchy savory snack. Learn how to make perfect Uppu Seedai Recipe with step by step pictures and video, have included easy tips to avoid bursting of seedai.

Uppu Seedai is a crispy snack made for Gokulashtami or Krishna Jayanthi festival. Though we prepare other offerings like aval, butter and murukku for Krishna Jayanthi - Seedai is one of the integral part of Gokulashtami so don't miss making and enjoying it.
Jump to:
About Uppu Seedai
Uppu Seedai also known as Uppu Cheedai is a crispy and crunchy snack made for Gokulashtami festival. Seedai in tamil is also called as Cheedai and is one important dish made for Krishnar Jayanthi from the Iyengar cuisine.
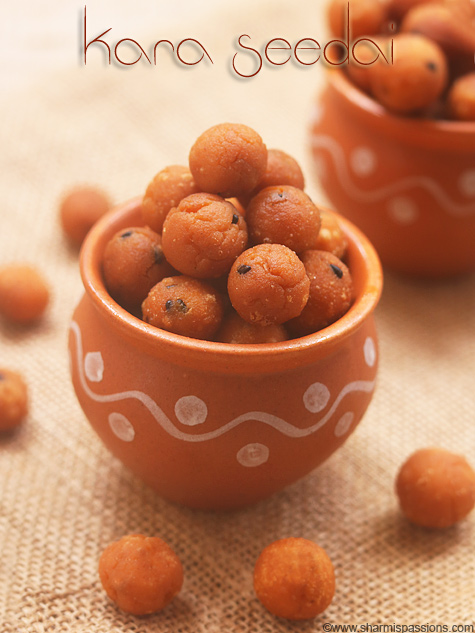
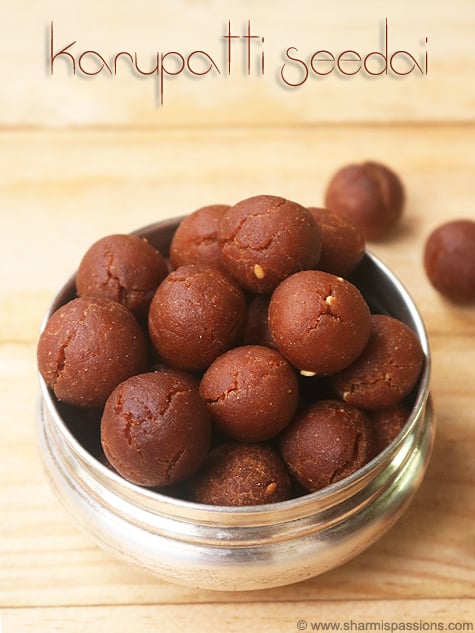
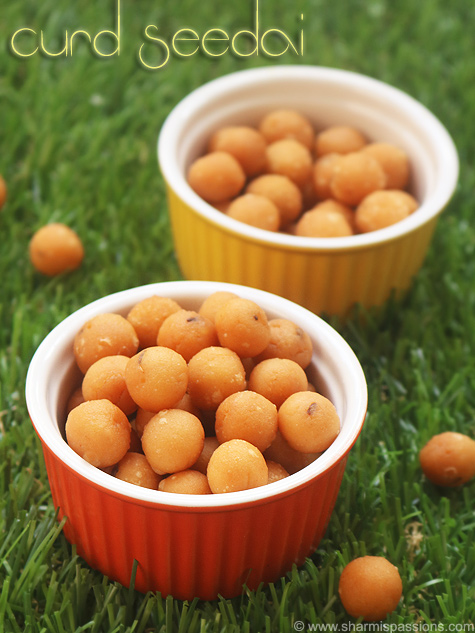
Seedai is made using rice flour, urad dal flour as main ingredients along with sesame seeds, salt, butter and coconut. There are several variations to seedai but this Salt Seedai or Uppu Seedai is the classic version.
Making of Seedai involves a bit of time and effort. Traditionally seedai is made from the scratch by making homemade flours which includes rice flour and urad dal flour then making seedai. However I have shared method to make seedai with store bought flour too.
These days many don't have the time to make the homemade flour from the scratch so you can make use of store bought flour. But make sure to roast and sieve that is the important step to avoid bursting of seedai.

Uppu Seedai Video
Similar Recipes
Uppu Seedai Ingredients
- Rice flour - You can either use homemade rice flour or store bought rice flour. Make sure it is roasted and sieved well and is fine.
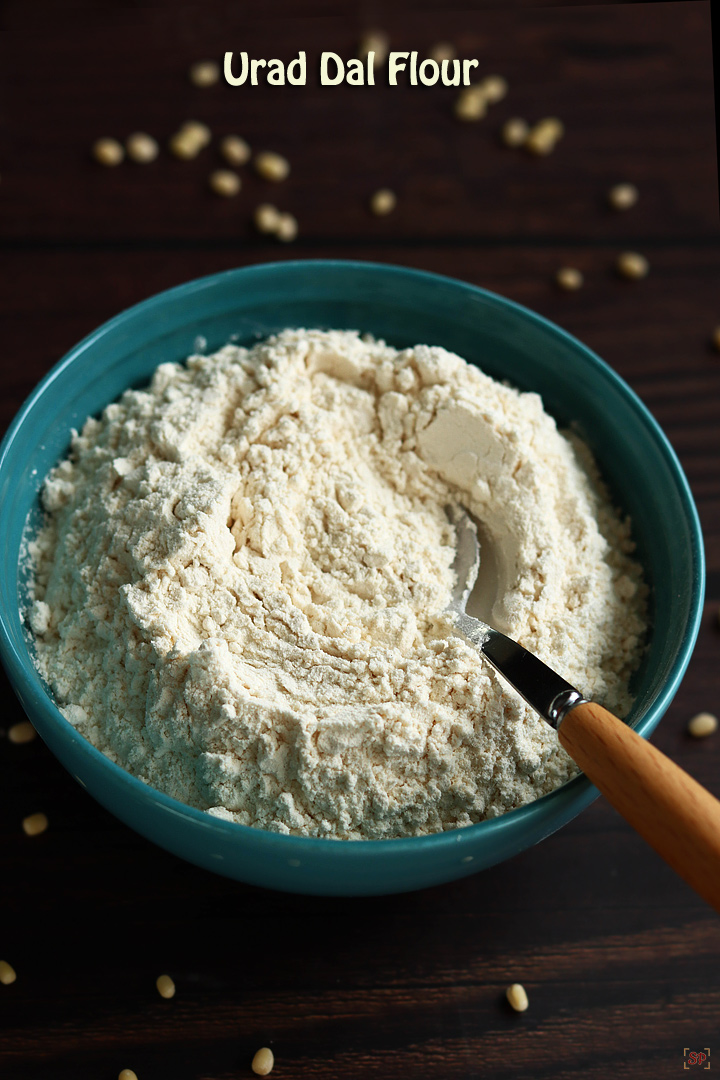
- Urad dal flour - Whole urad dal dal without skin is roasted, grind to a fine powder, roasted and sieved. Urad dal flour is also available ready made in stores
- Butter - Butter is added to give a melt in the mouth texture to the seedai.
- Sesame Seeds - Sesame seeds are traditionally added to the dough while making seedai. But you can replace it with cumin seeds too. You can use black sesame seeds or white sesame seeds.
- Coconut - Coconut is optional if you do not want to add skip it but it gives a nice texture and flavor to the seedai.

Homemade flour vs Store bought flour
- Homemade flour - Traditionally homemade rice flour and urad dal flour are used to make seedai. Soaking raw rice, then drying it for a while then grinding, sieving then again roasting and sieving is the best method for making homemade rice flour. You should be able to draw a line using the flour, after roasting this is the perfect way to check if the flour is ready. For making urad dal flour : We first roast urad dal until golden then grind it fine, sieve and roast again then finally store it. You can make the flours ready in advance then proceed making seedai.
- Store bought flour - Instant ready made flours are easily available these days in stores so you can use them too for making seedai. But make sure to roast well and sieve it once to ensure no speck is there then proceed.


Tips to make seedai and How to avoid seedai from bursting in oil
- Moisture - The moisture or air trapped inside the balls will make the seedai burst so pricking with holes with a toothpick or any sharp object and resting it in a dry cloth for 30 minutes are the key to a perfect seedai. Also roasting coconut ensures there is no moisture in it also.
- Sieving - Whatever flour you use either homemade or store bought roasting and sieving is a must.
- Grinding - If the rice flour and urad dal flour are not grind and sieved well they will end up having small grains in between which will cause the seedai to burst. So make sure both the flours are sieved well and are very fine.
- Rolling - Do not roll the balls tight, do them as smooth and gentle as possible. If you roll it tight then air bubbles might get trapped inside making them to burst. Also don't expect to get perfect rounds just pinch roll and allow it to rest.
- Drying - After the balls are made make sure to rest it in a cloth for a while for the extra moisture to leave. The wetness or moisture in the balls may lead to seedai bursting so always give it a good resting time.
But still make sure to be at a safe distance while frying the seedai especially if you are a beginner.

Seedai Recipes


How to make Seedai Step by Step
1.I used homemade flours that I made and stored - you can check the making in the recipe card. If using store bought flour also you need to roast it. Add 1 cup rice flour, roast until its easy to draw a continuous line as shown here, Set aside to cool.

2.Next roast 1 tablespoon urad dal flour for 2 minutes or until steam wafts from the flour. Set aside to cool.

3.Roast 1 tablespoon grated coconut until there is no moisture and becomes dry. No need to roast until golden. Set aside to cool.

4.To a sieve add roasted rice flour and urad dal flour.

5.Sieve well. Discard the remains.

6.Sieved flours ready.

7.Now add the sieved flours to a bowl along with 2 tablespoon melted butter, ½ tablespoon sesame seeds and roasted coconut.

8.Mix this well first to combine.

9.Then add water little by little to gather.

10.Gather to make a soft dough like shown below. It should not be sticky.

11.Pinch a tiny portion from the dough.

12.Roll it with your three fingers to make a smooth ball. Do not roll tight just roll roughly.

13.Do not worry about making it a perfect round shape.

14.Alternatively you can roll it using your palms too. In case if it sticks you can apply little oil in your fingers and palm.

15.Mild cracks are okay too while rolling as it helps in allowing moisture to dry up through the gap.

16.Repeat to finish, add the shaped balls on a dry cloth.

17.Prick the balls using a tooth pick just one prick for each ball.This step is optional but I recommend it strongly as it ensures no bursting seedai.

18.First test by adding one ball.

19.Once it is fried well without any busting you can proceed with the rest in batches.

20.Add few balls at a time.

21.Roll over and fry until golden.

22.Strain oil, remove using a perforated ladle. Now repeat with other batches and finish.

23. Uppu seedai is ready.

Store in a clean dry airtight container. Keeps well even for a month.

Expert Tips
- Make sure to sieve the flours.Add the remaining coarse flour to the next batch grind it then sieve repeat this process.
- Sieving the flours is a must and it will avoid 80% of bursting and the rest 20% is how you roll it.
- If you have your flour smooth and very fine then your seedais will be smooth else it will be slightly coarse textured.
- You can use butter at room temperature or melt the butter as I did.
- You can even give the flour to mill and grind it if you are doing in bulk.
- Pricking step is optional. I did it randomly when I tried it for the first time but now the have updated the pics and now I didn't do this but still it was perfect.
- Make sure both the flours are sieved well before use.
- Roll the balls very smooth but gently not tight so that no splits are shown outside.
- Do not attempt to make bigger balls, for proper cooking inside make small balls a slightly bigger than peas.
- If you feel your coconut is moist then dry roast in tawa for few mins and then add it. I added it raw only.
- You can even add ½ teaspoon cumin seeds along with sesame seeds.
- If your flame is high then your seedais will not cook evenly and will have brown shades here and there, the browning and cooking will not be even.
- If you get small bubbles and if your seedai is looking dry on the outside then butter is not enough, so measure and follow the quantity as mentioned above.
Storing & Serving Suggestion
Seedai can be served as a snack with evening tea or coffee. Store in an airtight container to retain freshness. Need not refrigerate. Keeps well for about a week.
FAQS
1.Why is my seedai bursting?
The moisture or air trapped inside the balls will make the seedai burst so pricking with holes with a toothpick or any sharp object and resting it in a dry cloth for 30 minutes are the tips to avoid bursting. Also while rolling do not roll tight, it is ok to have mild cracks in the seedai which will help the moisture to leave using that gap.
2.Why is my seedai not crisp?
Before adding the seedai make sure oil is hot enough to fry. Oil should be at the right temperature not smoky hot or not too low. Frying the seedai in correct oil temperature is the key to get perfect crispy seedais. You can first check by dropping one in oil, if it rises immediately then your oil is ready. If it browns immediately then oil is too hot, so you should lower flame then proceed frying.
3.Seedai drinks lot of oil. Why?
This is also because of the oil temperature if its not hot enough and you add the seedai then it will drink more oil and become soggy not crisp. Also if the dough is loose then it may drink more oil.

If you have any more questions about this Uppu Seedai Recipe do mail me at sharmispassions@gmail.com. In addition, follow me on Instagram, Facebook, Pinterest, Youtube and Twitter .
Tried this Uppu Seedai Recipe? Do let me know how you liked it. Also tag us on Instagram @sharmispassions and hash tag it on #sharmispassions.
📖 Recipe Card

Uppu Seedai Recipe
Ingredients
With Homemade Flour
- 1 and ½ cups raw rice
- 2 tablespoon urad dal
- 2 tablespoon coconut grated
- 3 tablespoon butter melted
- 1 tablespoon sesame seeds
- salt to taste
- oil to deep fry
With Readymade Flour
- 1 cup rice flour
- 1 tablespoon urad dal flour
- 1 tablespoon coconut grated
- 2 tablespoon butter melted
- ½ tablespoon sesame seeds
- salt to taste
- oil to deep fry
Instructions
- I used homemade flours that I made and stored - you can check the making in the recipe card. If using storebought flour also you need to roast it. Add 1 cup rice flour, roast until its easy to draw a continuous line as shown here, Set aside to coo
- Next roast urad dal flour for 2 mins. Set aside to cool.
- Roast coconut until there is no moisture and becomes dry. No need to roast until golden. Set aside to cool.
- To a sieve add roasted rice flour and urad dal flour.
- Sieve well. Discard the remains. Sieved flours ready.
- Now add the sieved flours to a bowl along with meled butter, sesame seeds and roasted coconut.
- Mix this well first to combine. Then add water little by little to gather.
- Gather to make a soft dough like shown below. It should not be sticky.
- Pinch a tiny portion from the dough.
- Roll it with your three fingers to make a smooth ball. Do not roll tight just roll roughly.
- Do not worry about making it a perfect round shape.
- Alternatively you can roll it using your palms too. In case if it sticks you can apply little oil in your fingers and palm.
- Mild cracks are ok too while rolling as it helps in allowing moisture to dry up through the gap.
- Repeat to finish, add the shaped balls on a dry cloth.
- Prick the balls using a tooth pick just one prick for each ball. This step is optional but I recommend it strongly as it ensures no bursting seedai.
- First test by adding one ball.
- Once it is fried well without any busting you can proceed with the rest in bacthes.
- Add few balls at a time. Roll over and fry until golden.
- Strain oil , remove using a laddle. Now repeat with other batches and finish.
- Uppu seedai ready. Store in a clean dry airtight container. Keeps well even for a month.
Video
Notes
- Make sure to sieve the flours.Add the remaining coarse flour to the next batch grind it then sieve repeat this process.
- Sieving the flours is a must and it will avoid 80% of bursting and the rest 20% is how you roll it.
- If you have your flour smooth and very fine then your seedais will be smooth else it will be slightly coarse textured.
- You can use butter at room temperature or melt the butter as I did.
- You can even give the flour to mill and grind it if you are doing in bulk.
- Pricking step is optional. I did it randomly when I tried it for the first time but now the have updated the pics and now I didn't do this but still it was perfect.
- Make sure both the flours are sieved well before use.
- Roll the balls very smooth but gently not tight so that no splits are shown outside.
- Do not attempt to make bigger balls, for proper cooking inside make small balls a slightly bigger than peas.
- If you feel your coconut is moist then dry roast in tawa for few mins and then add it. I added it raw only.
- You can even add ½ teaspoon jeera along with sesame seeds.
- If your flame is high then your seedais will not cook evenly and will have brown shades here and there, the browning and cooking will not be even.
- If you get small bubbles and if your seedai is looking dry on the outside then butter is not enough, so measure and follow the quantity as mentioned above.

Divya Kudua
Yum,I can have it all on my own.Love it,but not too daring to try it on my own!Kudos to you!
Shanavi
This reminds me my mom's tiresome job to make this for Gokulashtami..My mom too slightly prick the balls / making them not so perfect round balls also helps preventing from bursting..My mom's tips.. U've done it so perfectly and indeed u need a big round of applause for being the first timer who has managed to do it beaaautifully..Kudos
Gayathri NG
Hi sharmi i usually make sweet seedai for Gokulashtami urs uppu seedai looks delicious and surely will try for this Krishnar jayanthi, book marked.I am waiting for ur next recipes..i want to taste the raw dough..keep doing it..
uma shankar
Awesome!
priya ravi
seedais are looking so perfect and crunchy. well explained steps sharmi. im tempted to try it soon.
Vimitha Anand
Seedai looks so perfectly done. Crunchy and yummy dear.
srividhya Ravikumar
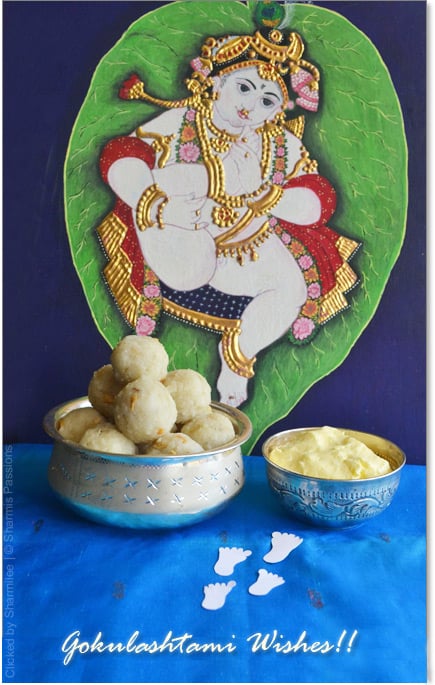
wow..perfect seedai...lovely kutty krishna..
Prathibha
This looks delicious,love this perfect snack....:)
ANU
awesome seedai dear...love the crunch...and your clicks are awesome...
Vardhini
This is on my list .. just postponing because of the bursting disasters :).. Anyway like you mentioned, I will probably try it for blogging sake. 🙂
Vardhini
Premalatha Aravindhan
wow it came out perfect,recipe is too gud...loved it.Kutti krishna luks amazing:)
RAKS KITCHEN
Wow,so beautiful seedais, the pics look divinely! Great work 🙂
Kalpana Sareesh
even am going to try this with ur method..thanks dear for tips n tricks..looks so good..
Satrupa
You introduced me to a new recipe .... looks very beautiful n delisshhh
Rekha shoban
super duper seedai!!!as usual nice click!
Shireen Sequeira
Wow! It was such a nice post Sharmi, to see the step by step pics also, its so nice when you can try out traditional stuff in your own kitchen. Uppu Seedai is very new to me, hope to try it soon
Spandana
wow...the step by step explanation makes it easy.... This recipe is new to me... since i am more inclined towards sweet, I will wait for the jaggery version 🙂
Priti
I love this and you got it so perfect ....nice pics
Paaka Shaale
Your seedais look so perfect Sharmilee!!! I have tried making this once and I just missed being burnt by a few secs. The oil in the wok was actually on the ceiling. From then on I have developed a phobia for frying these or anything for that matter. Hats off to you for trying these 🙂
M D
Gosh! Looks brilliant. Love those cute looking balls. 🙂
Sarah
ahh these look lovely and just perfect
Laxmi
looks perfect.. nice to know that it turned out success at the first time itself.. nice clicks.. love ur krishna idol..
Rumana Rawat
Awesome:)
Nisa Homey
Awesome!! Awesome!!.......amazing clicks.....
layaa
Ya,me too have an experience of the burst out recently,from that onwards i decided that i never make it again in my life.But, after seeing ur tips i too hav the success in my next attempt,thanks for ur tips.
jeyashrisuresh
great effort and the seedais turned out so well and cute clicks with krishnan idol. BTW, i like your kadai, and now iam seriously searching for a good kadai
Suma Gandlur
I love them.
As far as I know, resting them for abut 30 minutes is enough to avoid the bursting part. That's what we do. And pricking is not needed.
Now Serving
Ahaa 🙂 First class post! Happy KJ to you and yours - seedais are outta sight!!!
Suja
Crunchy and delicious..awesome clicks dear
Priya
Feel like munching some..i'll keep aside for few minutes before frying, never tried pricking them,will try next time..
Priya (Yallapantula) Mitharwal
Absolutely love that recipe 🙂
Krithi's Kitchen
On seeing the pics, cant believe you are a first timer... A big kudos to you.. Great job Perfectly done... p.s. I dont think I still have the patience or courage to try this..
Sobha Shyam
fabulous clicks, lovely explanations, a great recipe..
sangee vijay
enjoyed reading your first few para about your attempt 🙂 really u made it success,came out very good n perfect...thanx for the step wise pictures..bookmarked n want to try soon!!! no words to say abt your pictures n presentation..U ROCK !!! love it !!!
divya
Woww... looks simply delicious and perfect.. beautiful presentation too.. thanks for sharing 🙂
Uma
I love to munch them. You made a perfect round shape seedai.
Cheers,
Uma
Shri
Love the cute laddoos...:-)
Manju
i never got the courage to make them..the bursting of course! they look just perfect!
Kurryleaves
well presented...perfectly done...
DEESHA
They look so perfect. I love the pictures sharmilee
Sanjeeta kk
Oh I am waiting for my MIL to make these seedai!
An Open Book
have never had them but they look so darn cute
Angie's Recipes
Very crunchy and delicious!
Zareena
I remember eating this long back and fell in love with this crispy balls. Nice snaps.
Shobha Kamath
Lovely pics ! They look delicious too!
Mahimaa's kitchen
wow.. super. looks perfect without any cracks. krishnar cute a irukar.
Sheeja Krishnan
Sharmi, Thanks for the recipe. I tried it and came out pretty well..Your suggestion to prick them helped from bursting !!!Thanks a lot for that..
Vardhini
Sharmi .. have you tried making this with store bought flour. Only the homemade flour worked fine for me.
Vardhini
Sharmilee! :)
@Vardhini : I havent tried but my friends have tried and said it came out good....the store bought flour we get should very fine.
sree
ohh......sharmeeeee...... my godd.. i didnt expected that i can do SEEDAI in my life.. oh.. i donno how to convey my thanks.. today v finished puja and relished seedais omg it is awesome. no words to express. loads of thanks. you r greatt..
Pooja Rao
Hi
I am so glad.this dish would be prepared by my grandmother since so many years.Unfortunately we lost her 4 years ago and this was untold recipe of hers. i am so glad to see this. i got a feeling of being connected to her once again.
Sharmilee
Hi lovely seedais, i have been visiting ur blog for a long, great recipes have tried some, great job, thanks a lot. planning to try the uppu seedai, hopefully no disasters, i have a doubt, can i use ponni raw rice, or does this need a special variety of raw rice for the crispiness. i saw Maavu rice in the stores, should we use that for getting crispiness . btw am also Sharmilee 🙂
SHARMILEE J
That does give a smile on my face to reply to a person with my name 🙂 Here we get raw rice seperately the one we use for pongal...I used that.
Sharmilee
🙂 ok thanks
Absolutely Serendipitous
Hi Sharmilee, I'm great fan of your blog. Your seedais look perfect. Thanks for the tips as well. I noticed one thing though, for the store bought flour recipe vrsion, i don't see you mentioning Urd dal flour. Is it not required?
SHARMILEE J
It was a typo...sorry I missed it...have added it now..thanks for notifying.
Uma Ramesh
Hi Sharmilee.
Wonderful.The tips are useful.u mentioned to sieve the flour to avoid any dust particles.is it safe to add coconut and sesame seeds.waiting for ur reply .Thx.Umaramesh.
SHARMILEE J
Yes it is absolutely safe....
Durga Karthik.
The oil part has a tip.I think it should be very less.pls enlighten this part.
R. Shanthi
Hi Sharmilee i am a very big fan of your recipes. Have tried many of them and it turned out really well. I had a very bad experience (previous) with this seedai. I read the recipe, but still i am afraid to do this. Can we add any spice powder for this one.
SHARMILEE J
Yes you can add chilli powder if you want
Krutika Eashwaran
Thanx for da recipe.....followed it to the T ,came out very well....not even a single broken cheedai.