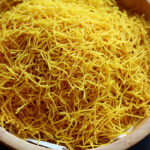
Omapodi is a crispy South Indian savory snack made using besan flour, rice flour, butter with the flavor of ajwain. Omapodi also called Sev is a great tea time snack and can be used for garnishing chats too. Omapodi Recipe is explained in this post with step by step pictures and video.
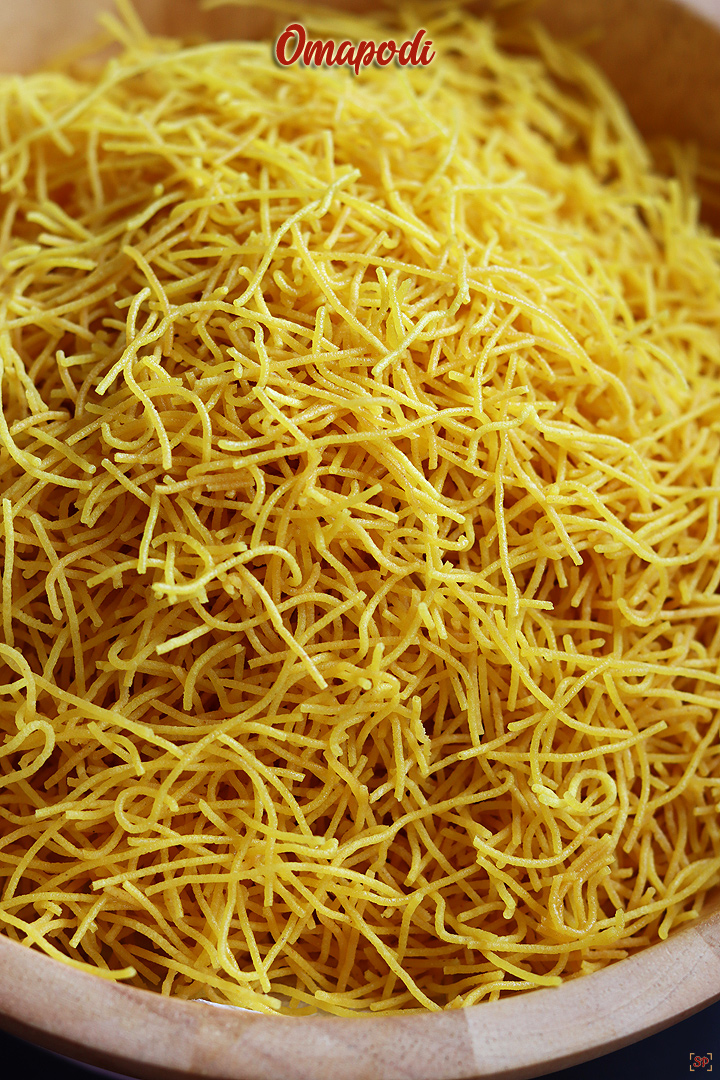
Omapodi is a crispy south indian snack made for Diwali or any festival. Omapodi is a quick savory snack you can make anytime. Omapodi or Sev makes a perfect crunchy snack to go along with tea or coffee. It is one of the snack that reminds me of my childhood days.
About Omapodi
Omam in tamil means Ajwain seeds so Omapodi translates to fine threads of sev with ajwain flavor. Omapodi is a snack that even beginners can try, no expertise needed. It is quick to make as there are no tricks, as the cooking time is very less because of the fine threads.
If you are looking for a more healthier version you can check out millet sev. This is one of the most commonly made Diwali snack. Omapodi can be eaten as such or can be used as garnish for chaats.
The taste of ajwain is the best in Omapodi and this snack is one of my favorites that I make it once in a while apart from festivals. Sev in English, Omapodi in Tamil and Karapusa in Kanada known by different names this is one of the must have festival snack.
Sev is a popular Indian snack made from chickpea flour (besan), rice flour along with spices. It is a crispy and crunchy snack that all ages will enjoy. Enjoy your homemade sev as a snack by itself or as a garnish for chaats like dahi puri, bhel puri, papdi chat, sev puri etc.
More teatime snacks
Video
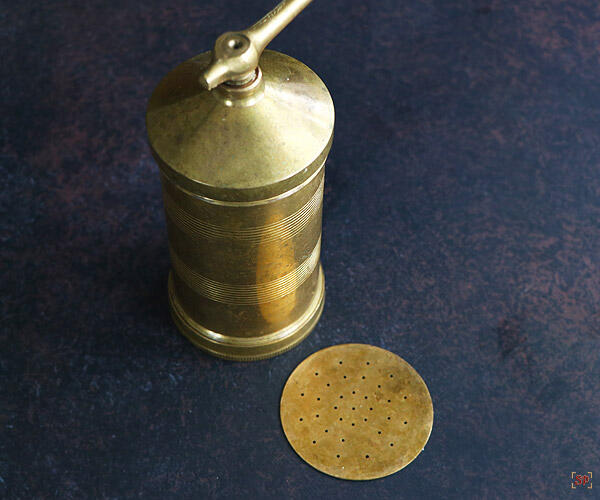
Omapodi Press
Idiyappam press is used for making omapodi or sev. The disc at the bottom is interchangeable - I use the same idiyappam press and disc for making omapodi or sev. Use a fine holed disc for omapodi. This press is readily available in stores and online too.
I have the press in wood, bronze and steel but always end up using my bronze press as it is easy to press without any difficulty. If you are new and want to buy one I would recommend buying a bronze press though it is a bit expensive when compared to others.
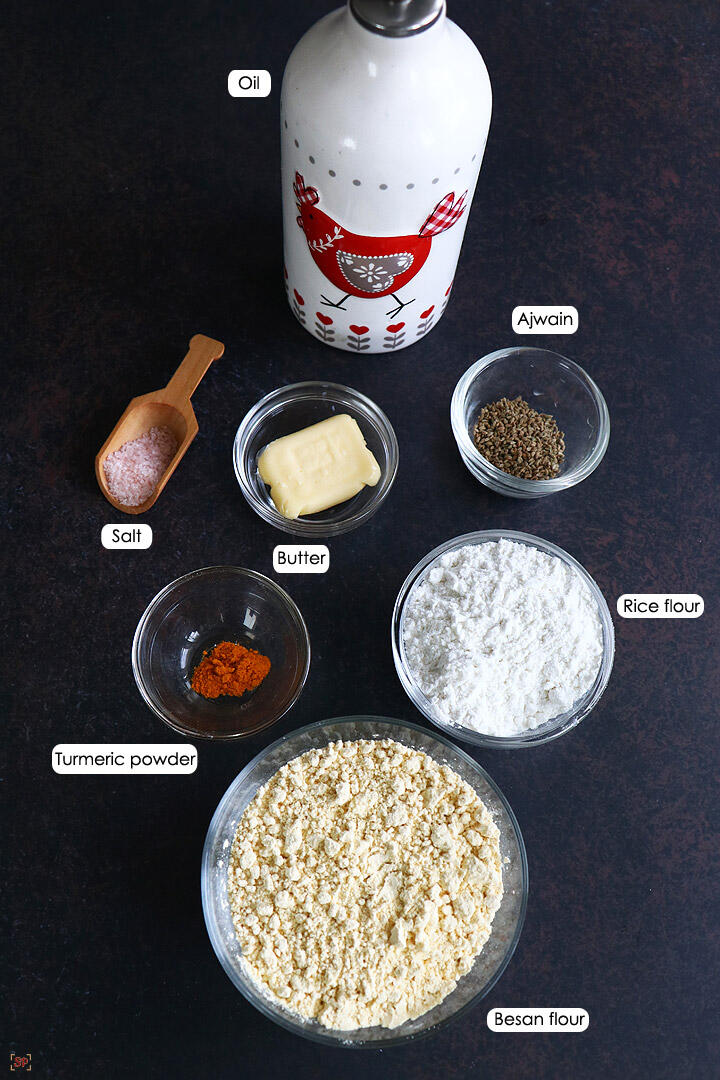
Omapodi Ingredients
- Flour - A perfect ratio of gram flour and rice flour gives crispy omapodi.
- Butter - Butter is added to give a soft melt in the mouth texture. Use fresh butter which is in room temperature.
- Ajwain - Ajwain or omam or carom seeds is the main flavoring in omapodi. Roasting and grinding makes the seeds brings out more flavor.
- Turmeric powder - Turmeric powder not only gives good color, it also gives a mild flavor too.
- Oil - Hot oil is added to make the dough as it helps in making omapodi more crispy.
How to make Omapodi Step by Step
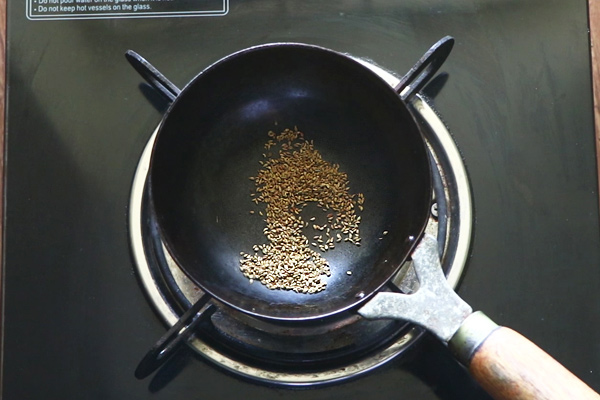
1.Dry roast 1 heaped teaspoon ajwain for 2 mins till nice aroma comes. Switch off and cool down.
2.Then add ajwain seeds to mixer jar along with little water say ¼ cup.
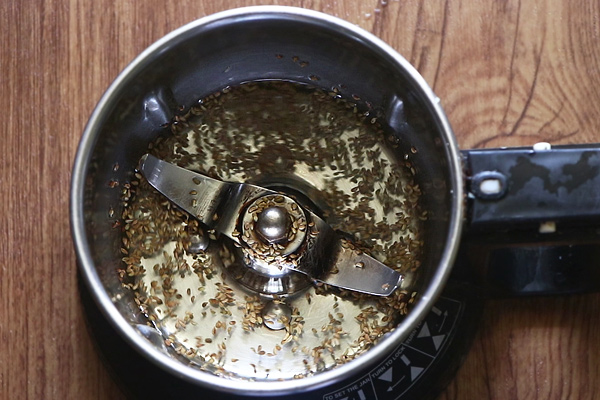
3.Blend it well.
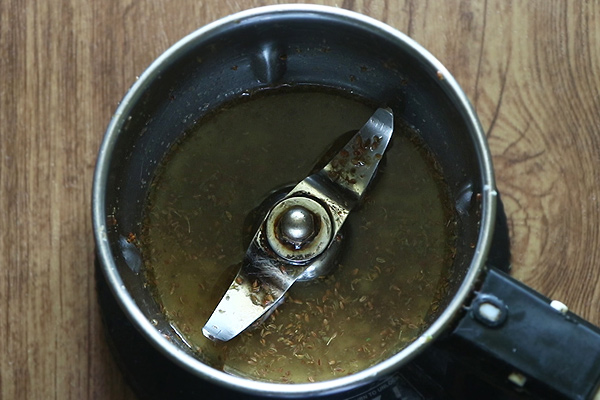
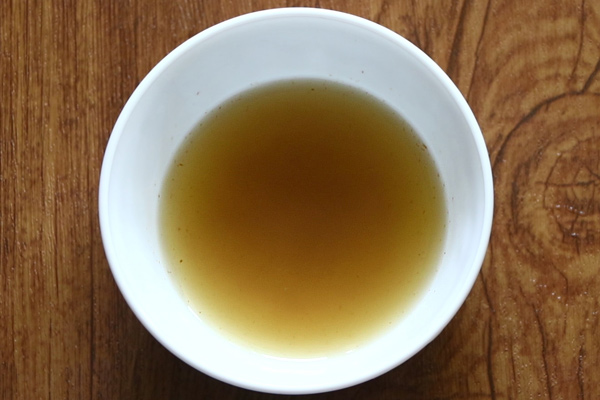
4.Then filter the ajwain water and keep aside.
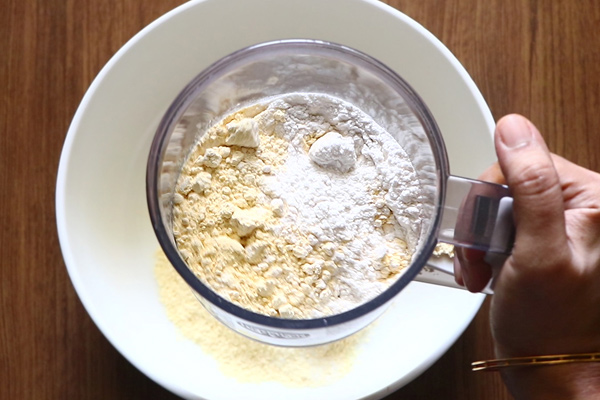
5.To a sieve add 1 cup besan flour, ¼ cup rice flour. Sieve it well, discard the remains.
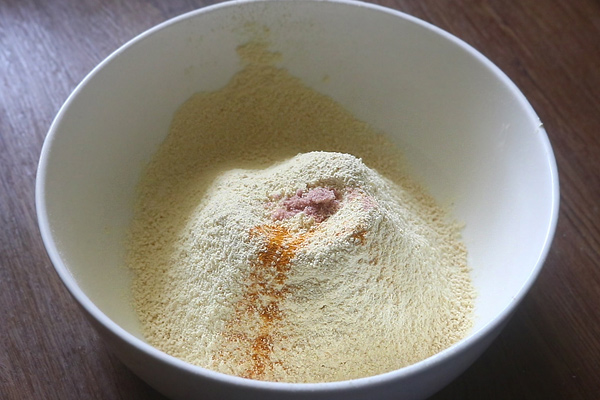
6.Add ¼ teaspoon turmeric powder, filtered ajwain water, ½ teaspoon hot oil, 1 tablespoon butter, required salt.
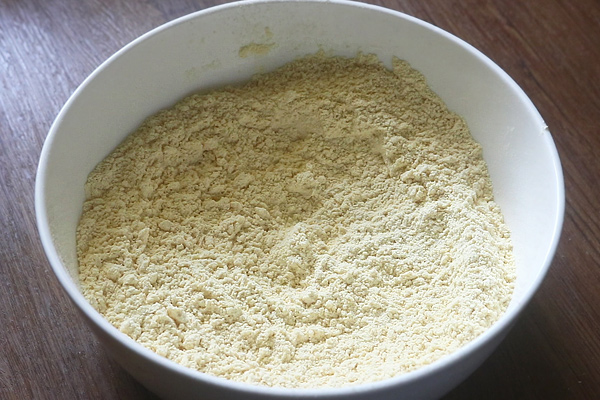
7.Mix this well first.
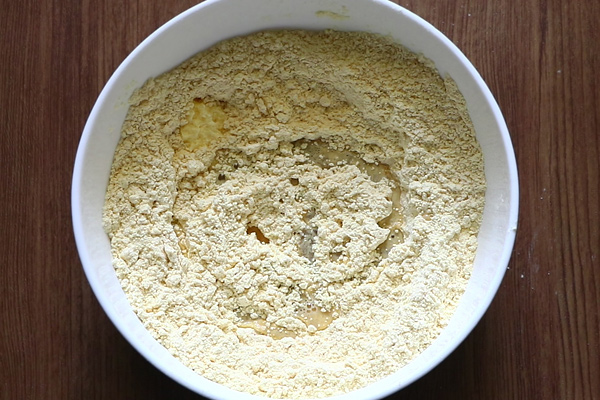
8.Add water little by little.
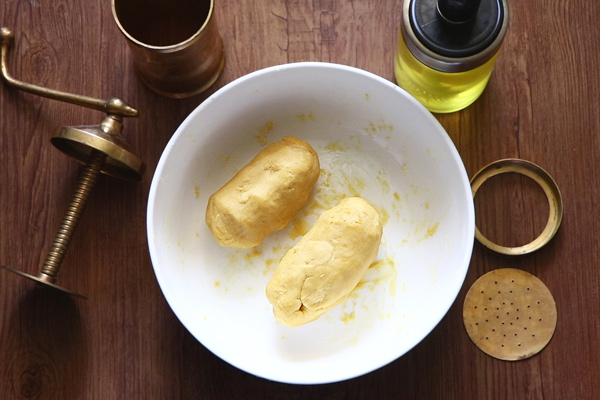
9.Mix well to form a soft slightly sticky dough. Make logs like this and keep it ready.
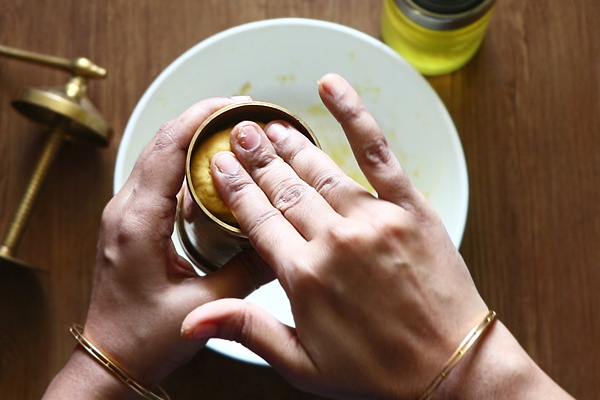
10.Grease the press with oil and then fill it with the dough till ¾th.
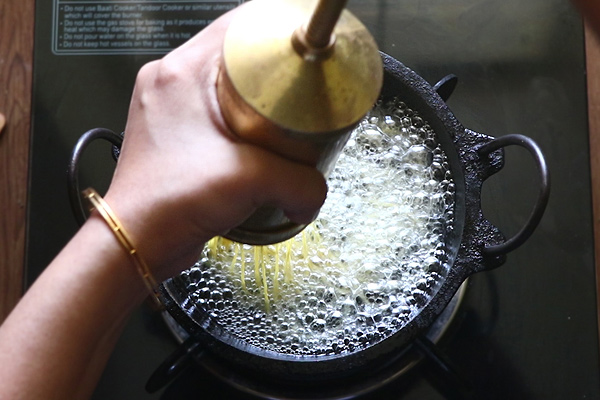
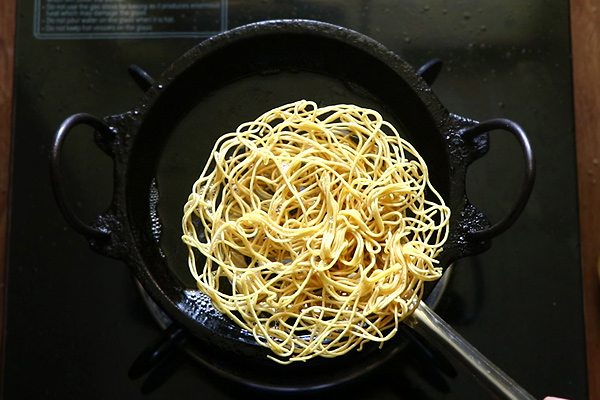
11.Meanwhile heat oil - To check if the oil is hot, pinch a small piece of dough and drop it in oil if it immediately comes to top then the oil is ready. Press it in the preheated oil starting from the corners like a circle finishing it up in the middle. Press in concentric circles and only a thin layer.
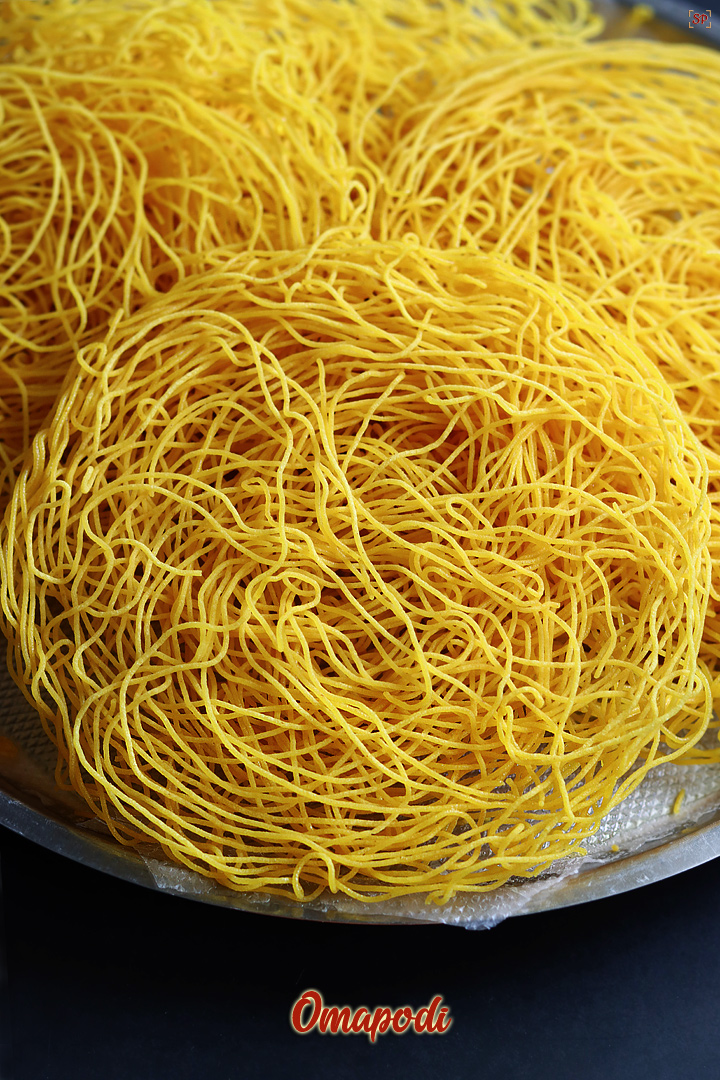
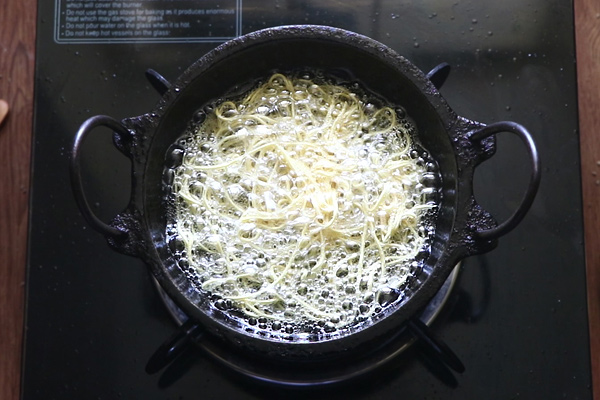
12.Once it is cooked on one side turn over to other side and cook till bubbles(shh sound) ceases. Repeat this process for the rest of the dough. Finally break it and store in an clean dry airtight container.
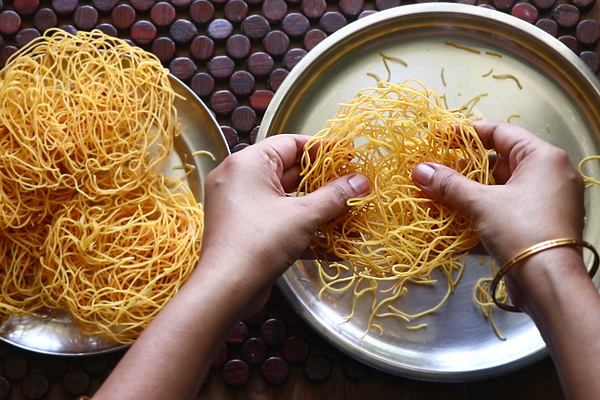
13.Cook until golden and crisp. Use a slotted ladle to remove. Drain in tissue.
14.Repeat to finish. Finally break it gently then store.
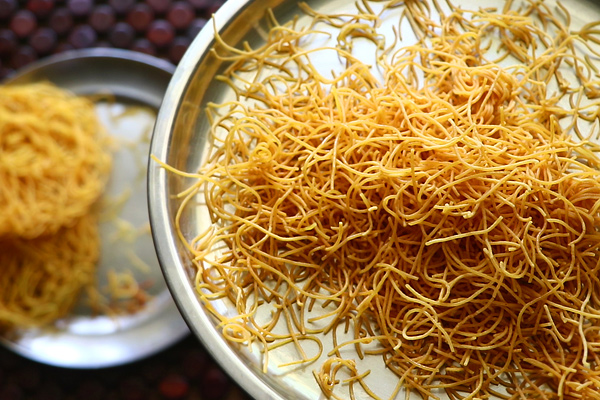
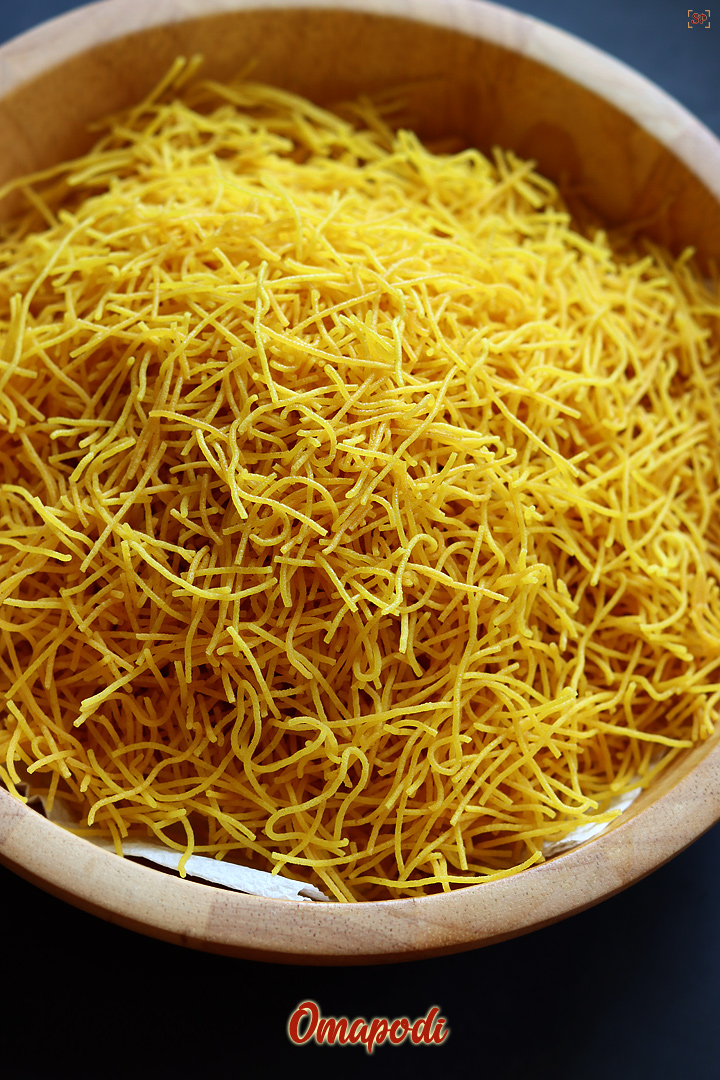
15.Plain Sev or Omapodi is ready! Store in an airtight container.
Expert Tips
- Be very careful while adding water as the dough consistency is very important.
- Always check by dropping a small pinch of dough before pressing to check if oil temperature is perfect. If it rises up steadily it means oil is ready then you can start pressing.
- While pressing make sure to press in concentric circles and only a thin layer. Do not crowd with more layers.
- Gently flip over and cook. Omapodi does not take much time just few seconds for each side is enough.
- Do not let the dough rest for more time as it will get dry and pressing will be very difficult .If it takes time then cover the dough with a wet cloth. Still if its difficult to press through, then sprinkle a little water to loosen the dough but very little.
- I used my idiyappam press as I like my sev to be very fine.
- I recommend using a fine holed disc for making sev.
Storing and Serving Suggestion
Always cool down completely before storing. Store it in a dry airtight container.
Omapodi can be served along with tea and had as such or can be used as a garnish for chats.
FAQS
1.What is Omapodi?
Omapodi is a crispy South Indian snack made with besan flour, rice flour, butter and ajwain as main flavor. Ajwain or carom seeds is called as omam in tamil hence the name 'omapodi'.
2. Sev is brittle and breaks while frying. Why?
If butter is more you may not get perfect continuous threads while pressing. In that case add little more flour, sprinkle little water mix well and try again.
3.Dough is hard to press.What to do?
If the dough is to tight then pressing may be difficult. Sprinkle little water to make it loose then try again. If the dough becomes too loose, the sev may drink more oil so be careful.
If you have any more questions about this Omapodi Recipe do mail me at sharmispassions@gmail.com. In addition, follow me on Instagram, Facebook, Pinterest, Youtube and Twitter .
Tried this Omapodi Recipe? Do let me know how you liked it. Also tag us on Instagram @sharmispassions and hash tag it on #sharmispassions.
📖 Recipe Card
Omapodi | Sev Recipe
Ingredients
- 1 cup besan flour
- ¼ cup rice flour
- 1 tablespoon butter at room temperature
- 1 heaped teaspoon ajwain
- ¼ teaspoon turmeric powder
- ½ teaspoon hot oil
- salt to taste
- oil for deep frying
- water as needed
Instructions
- Dry roast 1 heaped teaspoon ajwain for 2 mins till nice aroma comes. Switch off and cool down.
- Then add ajwain seeds to mixer jar along with little water say ¼ cup.
- Blend it well.
- Then filter the ajwain water and keep aside.
- To a sieve add 1 cup besan flour, ¼ cup rice flour. Sieve it well, discard the remains.
- Add ¼ teaspoon turmeric powder, filtered ajwain water, ½ teaspoon hot oil, 1 tablespoon butter, required salt.
- Mix this well first.
- Add water little by little.
- Mix well to form a soft slightly sticky dough. Make logs like this and keep it ready.
- Grease the press with oil and then fill it with the dough till ¾th.
- Meanwhile heat oil - To check if the oil is hot, pinch a small piece of dough and drop it in oil if it immediately comes to top then the oil is ready. Press it in the preheated oil starting from the corners like a circle finishing it up in the middle. Press in concentric circles and only a thin layer.
- Once it is cooked on one side turn over to other side and cook till bubbles(shh sound) ceases. Repeat this process for the rest of the dough. Finally break it and store in an clean dry airtight container.
- Cook until golden and crisp. Use a slotted ladle to remove. Drain in tissue.
- Repeat to finish. Finally break it gently then store.
- Plain Sev or Omapodi is ready! Store in an airtight container.
Video
Notes
- Be very careful while adding water as the dough consistency is very important.
- Always check by dropping a small pinch of dough before pressing to check if oil temperature is perfect. If it rises up steadily it means oil is ready then you can start pressing.
- While pressing make sure to press in concentric circles and only a thin layer. Do not crowd with more layers.
- Gently flip over and cook. Omapodi does not take much time just few seconds for each side is enough.
- Do not let the dough rest for more time as it will get dry and pressing will be very difficult .If it takes time then cover the dough with a wet cloth. Still if its difficult to press through, then sprinkle a little water to loosen the dough but very little.
- I used my idiyappam press as I like my sev to be very fine.
- I recommend using a fine holed disc for making sev.


Veena Theagarajan
great snack for anytime
Nivedhanams Sowmya
Wow so festive and tempting!!!
Celestina
Looks yummicious...!!! Keep going
Celestina
Looks Yummy Sharmi...!!!Keep going looking forward for more recipes this Diwali.
APARNARAJESHKUMAR
perfect texture sharmi ! loved it and easy to make it too 🙂
WeR SAHM
wow got a kind of crunchy munchy omapodi Sharmi...beautiful clicks
jeyashrisuresh
Just now i finished making omapodi, almost the same recipe. beautiful clicks and wonderful presentation
Divya Kudua
Love omapodi,but never tried making it on my own:)
srividhya Ravikumar
awesome clicks..love it.
Rashida Shaikh
This is nice snack and could be a good companion during traveling.
Vidya
Delicious omapodi...my fav snack!
Prathima Rao
Perfect & crisp oma podi!!Looks even better than the store bought version bcoz here it also has a special ingredient - a mother`s love & desire to make the best one for her loving daughter 🙂
Prathima Rao
Prats Corner
Priya
One plate pls, just love this crispy beauties,beautifully done.
Happy Cook / Finla
I love theese, but neve rmade them at home, but i am sure if i try it won't coe out so good too.
Satya
wow sev looks awesome...perfect color n superb crisp...gr8 work
runnergirl
I always have stock of this .. simple and delicious!
Turmeric n Spice
Thèse look so food !! Perfect
ANU
wow drool worthy...and perfectly done dear!
Sharmilee! :)
@thank you @Kookingmedley : Thanks for notifying have left a comment, lets see. I am removing ur comment as I dont want to give publicity to her space....hope you understand!
Vimitha Anand
Love oma podi any time... Looks so perfect...
dassana
you are a super mom, blogger and cook 🙂
divya
Slurp!! drooling here:)
Follow Foodie
Yummy!
Shema George
This definitely is a great diwali snack. I love it 🙂
Pen my thoughts
yummy! I have a doubt about the cup size..whats the measurement of the cup you use?250 ml?
RAKS KITCHEN
All time favorite. Looks very tempting!
Nandu
Description and pictures are nice. You are spreading the aroma of nice cooking. thank you
Nandu
Priya Selvaraj
Hey sharmi pls hv a look after point 4 I dnt understand yaar. Plannin to try this for Krishna jayanthi.
SHARMILEE J
It was a typo...have corrected it now Priya
Nivetha Thankathurai
omapodi was very tastyyyyyyyyy and it came out very wellll keep posting delicious recipessssss
Sushmitha Gomes
Hire Sharmiji,
Even I tried it out ystrday n it came out really well. Just wantd to know what shud I do invade I want garlic flavour or a lil spicy?
Sushmitha
SHARMILEE J
For spice, you can add red chilli powder.And crush garlic add the juice alone to make it garlic flavoured...
Sushmitha Gomes
Than n wish u a happy n a prosperous deepawali.
Sushmitha Gomes
нєαяту ωιѕнєѕ тσ уσυ αи∂ уσυя fαмιℓу σи тнє fєѕтιναℓ σf ℓιgнтѕ... мαу αℓℓ уσυя нαρριиєѕѕ ℓιgнт υρ αи∂ ѕσяяσωѕ вυяи συт."нαρρу ∂ιωαℓι"??
мαу тнιѕ ∂ιωαℓι вяιиg υ нαρριиєѕѕ, ρяσѕρєяιту, мαу
αℓℓ уσυя ρяσвℓємѕ gєт вυяѕт ℓιкє ¢яα¢кєяѕ &
єνєяутнιиg иєω αѕ ѕωєєт αѕ уσυ!!
ωιѕн υ αи∂ υя fαмιℓу α нαρρу αи∂ ρяσѕρєяσυѕ
∂ιωαℓι.
ammukutty
Hey Sharmilee,
I am a great fan of ur website... we made mixture today ( my hubby was allexcited :)) and offered his help as well).. It came out really well.....thanks a lot for posting such wonderful recipes with pics....
Bala Subramanian
u can also decorate it with roasted curry leaves
IP
Hi sharmi 🙂 I tried your muruku varieties..It came out well . Thanks for sharing such a good recipes. Now i have a query.. while doing muruku we used hot water for making dough. Do we need to use hot water for ompodi also. And in ompodi we use hot oil..I would like to know whats the difference in using hot water or hot oil...Thanks
SHARMILEE J
It keeps the dough hot/warm and easy to press....
rashmi raman
Hi
Could you pls tell me if we need to roast both the flours thank u
SHARMILEE J
No need ...
Adesara Sweta
hello ma'am I tried this plain sev its so crispy .... its a huge hit at my home n my father likes it so much... thank u...
sharmila dhandapani
Hi aharmi tday i tried tis... But when i pressed it to oil it changes to brown color.. I dunno wher i went wrong?