

Homemade Maida can be used for making many recipes like flatbreads, snacks, sweets and baking dishes. It is made by extracting milk from soaked wheat, then drying it completely and grinding it into fine powder. The texture is smooth and soft, very similar to store bought maida.
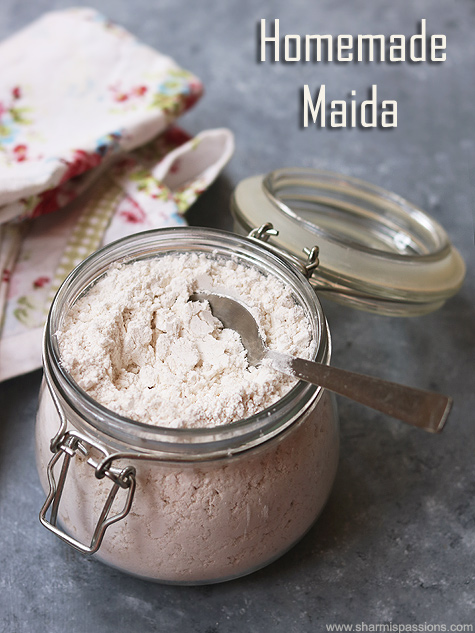
Many people like making Homemade Maida at home because they know exactly what goes into it. It does take little time and patience as the drying process needs good sunlight. Once made, you can store it and use whenever needed for different recipes in your kitchen.
Jump to:
About Homemade Maida
Homemade Maida is prepared from wheat by extracting the milk and separating the starch part. After resting, the thick portion is collected, dried and then powdered. The final flour looks white and soft and can be used in many recipes that call for maida.
The texture of this flour is smooth and very fine after sieving. It blends well in dough, batter and sweets. Since it is made from wheat milk, the flour has mild taste and works well in both sweet and savoury recipes.
You can make this using whole wheat, broken wheat, broken wheat rava or wheat flour. Each version may have slight difference in yield and texture, but the method remains mostly same. It is important to dry it completely before grinding so the flour stays fresh for longer time.
I usually make this during summer when sunlight is good. The drying becomes easier and the flour stores well for many weeks without any issue.
Now lets now learn why maida is unhealthy:
Wheat seed has 3 parts:
- Bran - is the hard outer covering where most fibre content is present.
- Germ - is the nutrient rich embryo that will sprout and grow into a new wheat plant.
- Endosperm - is the biggest part of the grain(about 83%) but is full of starch.
Whole wheat flour combines all 3 parts of the wheat berry. Though maida is made from wheat, it is prepared from only the endosperm which does not contain any nutrients and is only carbohydrate or sugar.
The bran is separated from the germ and endosperm which is then refined by passing through a sieve. It is naturally yellowish due to pigments present in wheat, but maida is bleached by oxygen in the atmosphere or artificially bleached using chemicals and more chemicals are added to give the white color, gluten and elasticity which makes it unhealthy to consume. Info courtesy : google
Homemade Maida Ingredients
- Broken Wheat - I have used broken wheat for making the wheat milk. You can replace it with whole wheat, broken wheat rava or wheat flour.
- Water - I used for soaking, grinding and extracting the wheat milk. It helps separate the starch from wheat properly. You can add little more if needed while extracting second and third milk.
How to make Homemade Maida Step by Step
1.I used broken wheat. You can use whole wheat or broken wheat or broken wheat rava or wheat flour(chapathi flour). Do not use UPMA RAVA.
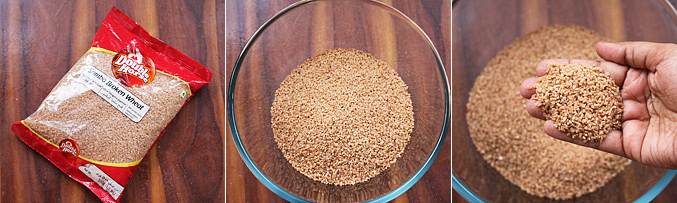
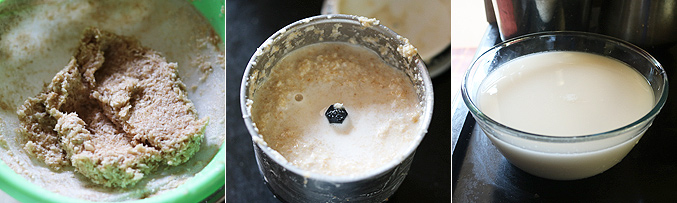
2.Soak broken wheat in water for at least 2-3 hours. Water level you can add it roughly its ok even its more but make sure water is at least 1 inch above broken wheat.Now transfer it to a mixer and grind it. Extract milk by transferring it to a fine strainer. I had to do it in batches.
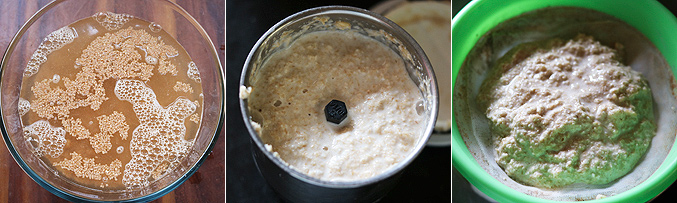
3.Press it well with a spoon and extract milk. Now again extract milk by adding more water.I did it thrice in total. First milk will be thick then the successive extracted milk will be slightly runny. Transfer to a large mixing bowl.I had got 2 such mixing bowls full of extracted milk.
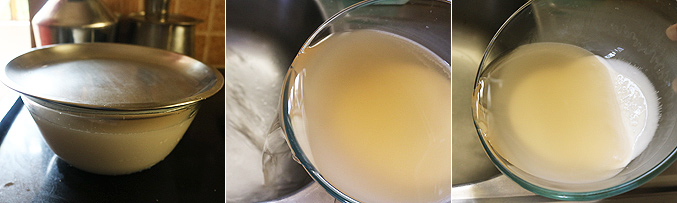
4.Keep undisturbed for an hour.You can see clear water floating on top.Slowly drain the clear water alone.Then you will be left out with only thick milk. I got 2 bowls so strained both separately.
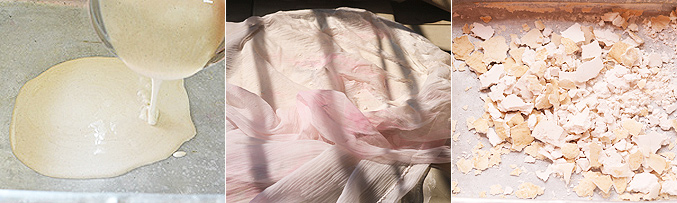
5.Now pour the thick milk to a flat bottomed wide tray. Let it dry under the sun for atleast 2-3 days until it becomes dry completely and starts to show splits.Keep covered with a netted cloth or you can use your dupatta too, this way we can avoid flies and dust.I broke them roughly. It took me just 2 days to dry as its summer.
6.Transfer to a mixer jar and powder it finely. I used my small mixer jar to powder it finely so had to do in batches.
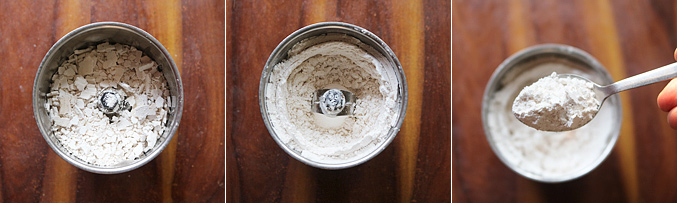
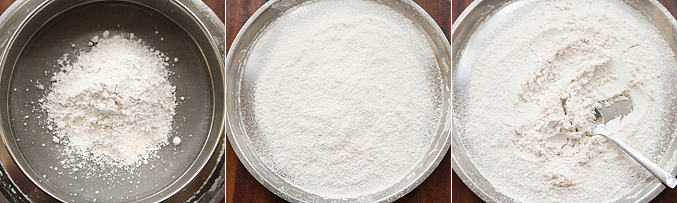
7.Sieve it using a fine sieve. Cool down then store.
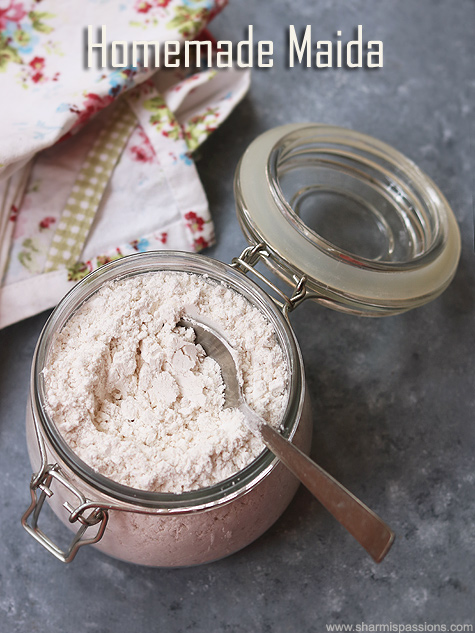
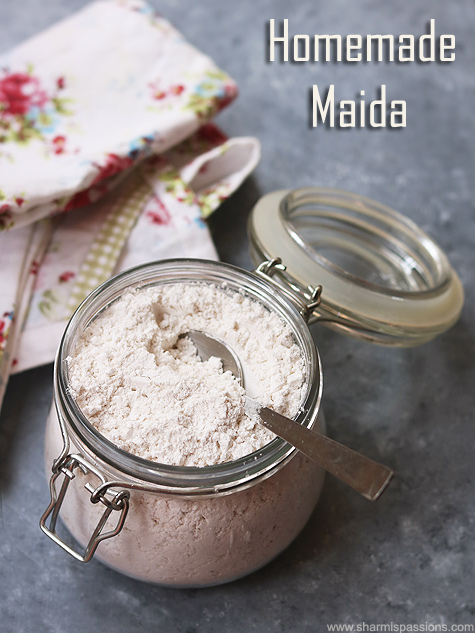
Store in clean dry airtight container.
Expert Tips
- Soaking - I usually soak the wheat for few hours so it grinds smoothly. Proper soaking helps extract more milk from wheat.
- Milk Extraction - You can extract milk more than once by adding water again. I have found that second and third extraction gives extra starch.
- Resting Stage - Let the extracted milk sit without disturbing it. This helps the starch settle at the bottom while clear water stays on top.
- Sun Drying - Dry it only when there is good sunlight. If moisture remains, the flour may develop smell after storing.
- Grinding Fine - I have used small mixer jar and ground in batches. Grinding well gives smooth flour and easier sieving.
Serving and Storage
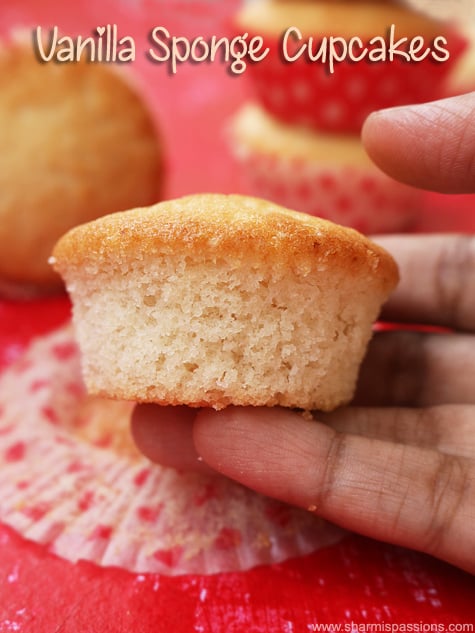
You can use for making biscuits, cakes, snacks, flatbreads and sweet, just use it the same way you would use regular maida in recipes. Store the flour in dry airtight container after it cools completely. If stored properly, it stays good for several weeks.
FAQS
1.Can I use whole wheat?
Yes, you can use whole wheat for this recipe. The extraction process remains almost same and gives good results.
2.Why should I dry it completely?
The flour should be fully dry before grinding. If moisture remains, it may develop bad smell while storing.
3.Can I make this without strong sunlight?
Without enough sunlight, the drying may take much longer and affect storage life.
4.How long can I store Homemade Maida?
You can store it for many weeks in airtight container, the flour should be completely dry before storing.
5.Can I grind in batches?
Yes, you can grind it in small batches if your mixer jar is small. I usually do it that way for getting fine powder.
If you have any more questions about this Homemade Maida Recipe do mail me at sharmispassions@gmail.com. In addition, follow me on Instagram, Facebook, Pinterest, Youtube and Twitter .
Tried this Homemade Maida Recipe? Do let me know how you liked it. Also tag us on Instagram @sharmispassions and hash tag it on #sharmispassions.
📖 Recipe Card
Homemade Maida Recipe
Ingredients
- 500 gms broken wheat*
- around 750 ml water roughly + you may need more while grinding and extracting 2nd and 3rd milk.
* You can use whole wheat or broken wheat or broken wheat rava or wheat flour(chapathi flour).
Instructions
- Soak broken wheat in water for at least 2-3 hours. I used broken wheat. You can use whole wheat or broken wheat or broken wheat rava or wheat flour (chapathi flour). Do not use UPMA RAVA. Water level you can add it roughly so its ok even its more but make sure water is at least 1 inch above broken wheat.
- Now transfer it to a mixer and grind it.
- Extract milk by transferring it to a fine strainer. I had to do it in batches. Press it well with a spoon and extract milk.
- Now again extract milk by adding more water. I did it thrice in total. First milk will be thick then the successive extracted milk will be slightly runny.
- Transfer to a large mixing bowl. I had got 2 such mixing bowls full of extracted milk.
- Keep undisturbed for an hour. You can see clear water floating on top.
- Slowly drain the clear water alone. Then you will be left out with only thick milk. I got 2 bowls so strained both separately.
- Now pour the thick milk to a flat bottomed wide tray. Let it dry under the sun for at least 2-3 days until it becomes dry completely and starts to show splits.
- Keep covered with a netted cloth or you can use your dupatta too, this way we can avoid flies and dust. I broke them roughly. It took me just 2 days to dry as its summer.
- Transfer to a mixer jar and powder it finely. I used my small mixer jar to powder it finely so had to do in batches.
- Sieve it using a fine sieve. Cool down then store. Store Homemade Maida in clean dry airtight container.
Notes
- Soaking - I usually soak the wheat for few hours so it grinds smoothly. Proper soaking helps extract more milk from wheat.
- Milk Extraction - You can extract milk more than once by adding water again. I have found that second and third extraction gives extra starch.
- Resting Stage - Let the extracted milk sit without disturbing it. This helps the starch settle at the bottom while clear water stays on top.
- Sun Drying - Dry it only when there is good sunlight. If moisture remains, the flour may develop smell after storing.
- Grinding Fine - I have used small mixer jar and ground in batches. Grinding well gives smooth flour and easier sieving.

Sana
I never realized maida is made in such a tiresome process. Thanks alot di, your site is ❤.
I love each of the recipes, but my favorites are baked goodies. ☺
Sharmilee J
I am not really sure if this much hardwork is put in storebought flour...thank you so much!
Rajesh
When we are used to eat such a huge varieties of dishes made using all purpose flour AND No Maida flour is found in any store in your location!, then this process of home making Maida is just easy! 🙂
Uma
This is so cool and so much work involved.. but homemade is always best as we know what goes in. Nice to come here in comment after few look years and feeling nostalgic sharmi!!! ❤️❤️
Sharmilee J
Aww thank you so much Uma! Feels good too 🙂
Nithya Ashokkumar
Love this recipe, thank you so much!
Neeraja
I never knew that maida can be made at home. Thanks for sharing. I have a query. Few of the recipes with maida would need elasticity. Will homemade maida have the same kind of elasticity as the store bought ones?
Sharmilee J
yes it will have though not much as the store bought ones...will share more recipes soon 🙂
Priya
Thanks for the wonderful recipe. Can you please let me know how this is different from wheat flour .
T.loganayaki Thamilselvan
Really superb recipe. I am also searched how to make healthy maida flour. Thanks for sharing this healthy maida flour recipe.
Suganthi
Hi, thanks for sharing the forgotten old method of making flour. Even my grandma made ragiflour for babies like the above method. I avoided baking goodies using Maida. Now I can happily prepare. Thanks 🙏
Shireen
Wow i never thot we can maida at home..will definitely try..can i use this to make cakes...will there be any dfference
Sharmilee J
So far have tried 3 bakes and nothing failed 🙂
Fermie Praisid
Hi Sharmi..
That is a wonderful recipe. I am definitely trying it. What is the shelf life of homemade maida? Is it stored in fridge or outside is fine??
Sharmilee J
1 month
Nithya
Hi sharmili,
Thank you sharing the recipe? Does it have gluten?
Girija.M
I am a regular reader of ur website for some time now.ur recipes are toooo goood.i have tried many recipes and it all came out so well.this homemade maida receipe is awesome.will surely try it very soon.i was looking for a subsitute fr store brought maida.this is perfect.
Saranya
Hi Sharmi,
The process looks same till extracting milk for wheat halwa.Isn't it?
Sharmilee J
yes yes exactly
Akalya
Can we extract in the evening and dry it the next day? Also, can we use this only for baking or else for making sweets and other purposes also?
Akalya
All your receipies are awesome! I have a doubt. Can we extract this in the evening and dry it the next day? Also, can we use this only for baking or else for sweets and other purposes also?
Sharmilee J
No the soaking drying extracting time should be as mentioned else it will become sour and give a bad foul smell.I havent tried for sweets will try and post it.
Sunitha
How long can we store this?? How to store proper? ??
Sharmilee J
May be for a month in room temperature.Store in a dry container.
Ramya
Thanks for a wonderful recipe which is a master recipe for a lot of home baking recipes! Have one query, just to understand better - when we strain out the milk, do we lose nutrients in that? We definitely don't use artificial chemicals here, so what we get is not at all harmful but am trying to understand the final product from this method in terms of it's nutrient value, can you please elaborate on that Sharmilee? In any case, it's a highly amazing replacement for the store bought variety and I'll definitely go for it, so thank you!
Sharmilee J
Sure will let you know soon
Sakthipriya
Hi sharmi ka, can this homemade maida used whike making bread??
Sharmilee J
yes you can try...I havent tried it
Ramtin
Hi Sharmilee, thank you for all of your recipes. I have a question about this recipe. From what I learned in bakery the process you used would separate the wheat starch and wheat gluten from each other. So, maida is similar to wheat starch right? I read in other websites that maida is similar to cake flour so, now I confused which one is maida because, cake flour contains gluten but, here you removed the gluten completely and only used the white milk which contain starch of the wheat.
Sharmilee J
I am not sure of wheat starch but this flour looks more like rice flour in nature also feel like no gluten but works beautifully for cakes.
Rajesh
Thanks for showing this process of making All purpose flour!. Nicely explained.
Rupalini
Hi. Have you tried making bread with this ?
Sharmilee J
No I have tried just cakes and cookies, this wont work for bread I guess.