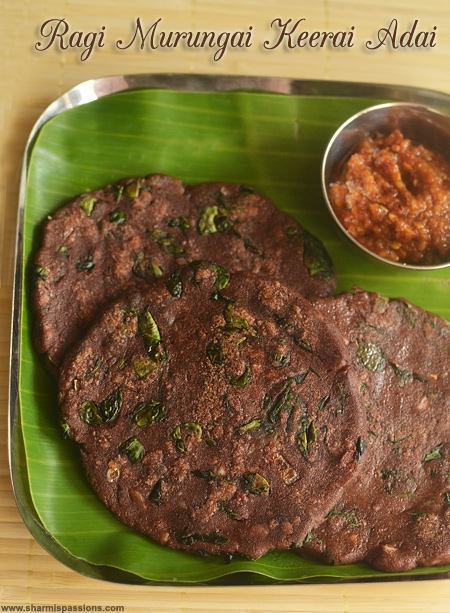
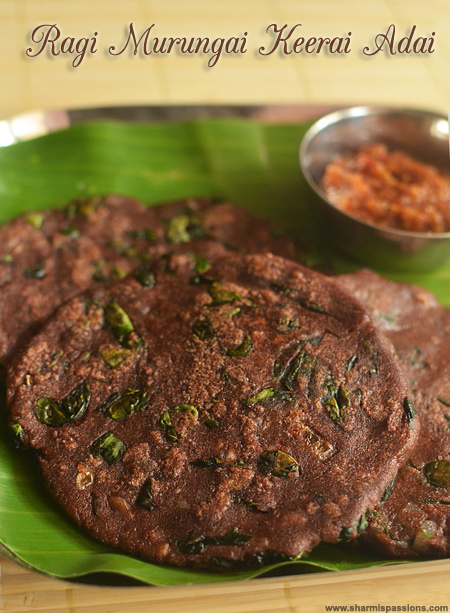
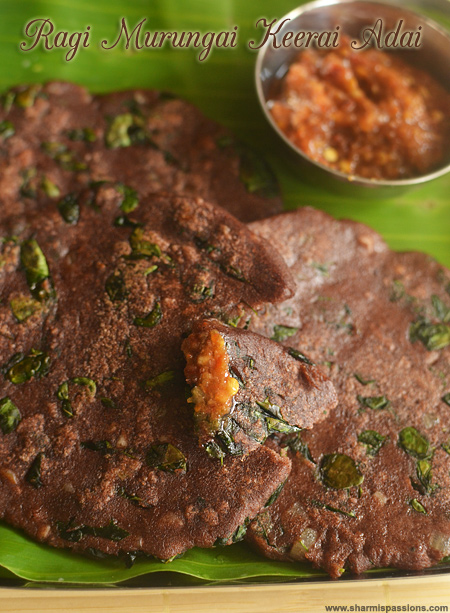
Ragi adai is an Indian flatbread made with finger millet (ragi) flour added with some vegetables/ or reen leafy vegetable. It is a popular South Indian breakfast recipe. Ragi is a powerhouse of calcium, iron and fiber. The slow digestive power of ragi helps in gradual release of glucose in bloodstream and hence maintaining energy throughout the day. Due to its fiber content, it aids in digestion and hence helps in managing blood sugar levels. It is a very nutritious and fulfilling breakfast/snack alternative.
It is very simple to prepare with minimal ingredients. This recipe does not need any pre-preparation and hence can be prepared on the spot and served hot. This recipe is very handy on days when you have no stock of idli/dosa batter and yet you need a nutritive breakfast. You can add in vegetables of your choice to the dough or just go by adding drumstick leaves. In Tamil Nadu, ragi adai is usually available in all restaurants and eateries and is served with coconut chutney, which makes it a deadly combination.
Jump to:
About Ragi Adai
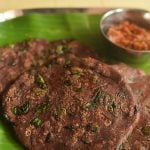
Ragi adai is a mild savory pancake that is made from ragi flour that is mixed with cooked vegetables and the pancakes are slow cooked on dosa tawa evenly on both sides.
At times, drumstick leaves are added, you can add carrots too which enhances the flavor of the adai. This is very quick to make when you have time constraints and at the same time it is nutritive and filling as well. Children would love to have it as a snack box menu too.
Ragi adai has two variants, one is the savory and the other is sweet version where chopped coconut and jaggery are added to the ragi flour and this too tastes so divine. The savory ragi adai is served with simple coconut chutney/sambar. It is a great choice for those looking to include millets in their regular breakfast menu.
Ragi adai is a great option for diabetics as breakfast as ragi helps in slow release of sugar in the blood stream and as a result helps in satiating hunger. It is less tedious to prepare and hence is a go to recipe for all working mothers who would want to kick start the day with a power-packed breakfast.
I love ragi adai, both savory and the sweet version. It was a regular evening snack during my school days. Though these days I am not fond of them very much, but occasionally wouldn't mind having them for breakfast.
At times, when I feel hungry and I am left with no other choices, I just prepare the sweeter version and my children wouldn't complain either. Yesterday, I craved for the adai so immediately prepared it and clicked the pictures to post it as well.
Ragi Adai Ingredients
- Ragi flour - I have used store-bought flour. Use homemade ragi flour for optimum benefits.
- Greens - Adding grated carrot enhances the flavor of the adai as ragi has bland taste.
- Onion - Enhances the texture and flavor of the adai.
- Coconut - Adds crunch and mild sweetness.
- Mustard seeds, Urad dal, Cumin seeds - used for tempering the adai.
- Coriander leaves - Induces aroma and flavor to the adai.
Why this recipe works
- This recipe is perfect for days when there is no stock of dosa/idli batter.
- This recipe is easy and doesn't need elaborate pre-preparation.
- It is nutritive and satisfying breakfast/snack option.
- Children would love having this and easily one of the yummiest recipes prepared with ragi.
- As ragi is full of fiber, this will keep you full for longer duration.
Similar Recipes
How to make Ragi Adai Step by Step
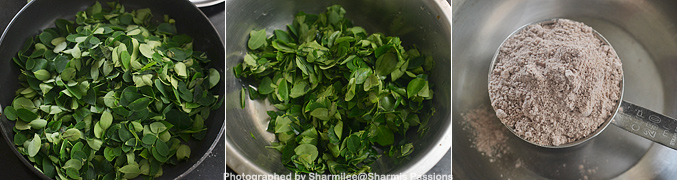
1.Clean drumstick leaves and remove from stalk. Chop it roughly(optional), rinse it well and set aside. Now measure ragi flour and set aside.
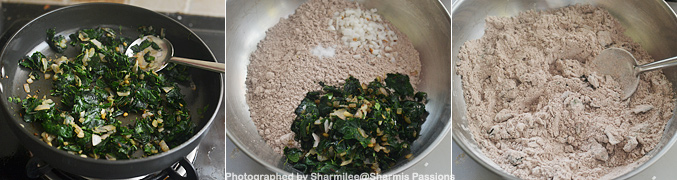
2.Heat oil in a pan - add the items under 'to temper', let it splutter then add onion saute for a minute then add drumstick leaves.
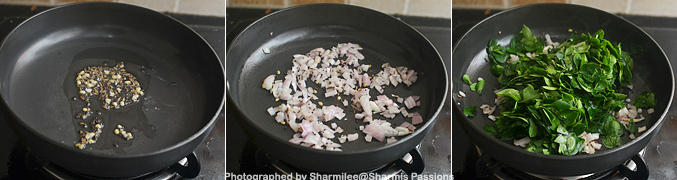
3.Saute and cook till color starts to change and raw smell leaves, set aside for few mins to cool down. Now add this to ragi flour along with coconut pieces, required salt, give a quick mix.
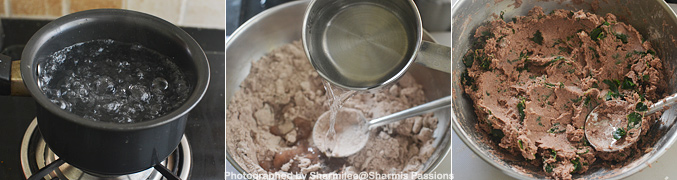
4.Boil water and add it little by little. Keep mixing with a ladle till it forms a smooth dough, it will be slightly sticky. Just rinse your hands with water then handle the dough.
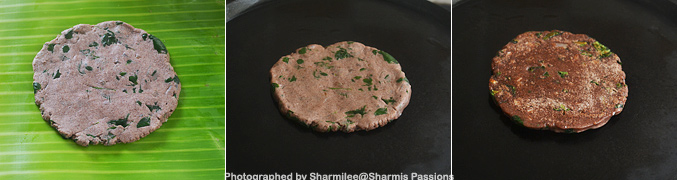
5.Grease a polythene sheet / banana leaf. Take a big lemon sized ball and place it on the greased sheet. Flatten it. Start patting it with your fingers till its thin as shown in the pic. You can make 2 adais at a time so that you can alternate them while one is getting cooked in the tawa.

6.Heat dosa tawa and drizzle oil. Carefully flip the adais on the dosa tawa. Toast the adais on both the sides, drizzle oil. Flip over only when one side is cooked, cook both sides.
Serve hot with any chutney of your choice
Expert Tips
- Use hot water - Mix the flour with hot water to form pliable dough as this will allow the flour to partially cook.
- Sauteing - Saute the onion and carrots well until the raw smell diminishes.
- Dough consistency - The dough prepared should be soft and pliable so as to ensure that you can spread it easily.
- Cooking adai - Make sure adai is cooked on medium flame both the sides so as to ensure it is cooked evenly on both sides.
Serving and Storage
Serve ragi adai hot with either coconut chutney or sambar. The adai tend to be soft only when it is hot and becomes chewy on cooling down, so always have adai in a casserole covered.
The ragi dough can be kept in fridge for 2 days. It has to be brought to room temperature before it is used. The adai has to be prepared and consumed the same day.
FAQS
1.Can I use normal water instead of hot water while preparing the dough?
Yes, you can use normal water too. Adding hot water aids with partial cooking of the ragi flour and also tends to yield softer adai.
2.Can I use carrot instead of drumstick leaves?
Yes, you need to just sauté the drumstick leaves before adding it to the dough.
3.Can I deep fry the adai in oil instead of cooking it on tawa?
You can deep fry in oil but if your dough consistency is very loose then the adai tends to absorb more oil.
4.Why is my ragi adai not able to hold shape and it breaks before transferring it to the tawa?
The main reason behind this could be your dough consistency, make sure that your dough is not too watery. It should be pliable and soft.
5.Will ragi digest easily for kids?
Because of its rich fiber content, it is easily digestible in kids.
If you have any more questions about this Ragi Adai Recipe do mail me at sharmispassions@gmail.com. In addition, follow me on Instagram, Facebook, Pinterest, Youtube and Twitter .
Tried this Ragi Adai Recipe? Do let me know how you liked it. Also tag us on Instagram @sharmispassions and hash tag it on #sharmispassions.
📖 Recipe Card
Ragi Adai Recipe
Ingredients
- 1 and ½ ups ragi flour
- 1 and ½ cups drumstick leaves grated
- ¼ cup big onion chopped finely
- 1 tablespoon coconut
- oil as needed
- salt to taste
- water as required
To temper
- 2 tablespoon oil
- ¾ teaspoon mustard seeds
- ¼ teaspoon urad dal
- ¼ teaspoon cumin seeds
Instructions
- Clean drumstick leaves and remove from stalk. Chop it roughly(optional),rinse it well and set aside. Now measure ragi flour and set aside.
- Heat oil in a pan - add the items under 'to temper', let it splutter then add onion saute for a minute then add drumstick leaves.
- Saute and cook till color starts to change and raw smell leaves, set aside for few mins to cool down. Now add this to ragi flour along with coconut pieces, required salt, give a quick mix.
- Boil water and add it little by little. Keep mixing with a ladle till it forms a smooth dough, it will be slightly sticky. Just rinse your hands with water then handle the dough.
- Grease a polythene sheet / banana leaf. Take a big lemon sized ball and place it on the greased sheet. Flatten it. Start patting it with your fingers till its thin as shown in the pic. You can make 2 adais at a time so that you can alternate them while one is getting cooked in the tawa.
- Heat dosa tawa and drizzle oil. Carefully flip the adais on the dosa tawa. Toast the adais on both the sides, drizzle oil. Flip over only when one side is cooked, cook both sides. Serve hot!
Notes
- Use hot water - Mix the flour with hot water to form pliable dough as this will allow the flour to partially cook.
- Sauteing - Saute the onion and greens well until the raw smell diminishes.
- Dough consistency - The dough prepared should be soft and pliable so as to ensure that you can spread it easily.
- Cooking adai - Make sure adai is cooked on medium flame both the sides so as to ensure it is cooked evenly on both sides.
Meena Srinivasan
Thank you Sharmi, this is my dream dish, I ate this in school days, now got the pakka recipe from you. Please give the sweet version soon, so we make this as weekend special at home. The photographs are really so good, tempting to make and taste soon. Adai texture is able to see clearly in photos, Oru pattu pudavai design and colour combo... Dark Brown adai in green valai illai plate, with light green chutney bowl with white chutney, more lighter green backdrop, orange and green colourful napkin.... your colour combination, creativity, the photo shows the thin... crispy.. feel of the adai...really you are very creative person. Your food photography is excellent. Keep it up.
SHARMILEE J
Aww thank you so much Meena! Though these adais are so healthy they arent photogenic so wanted to show it as tempting as possible, with ur words am happy that I've achieved it 🙂
Rishikesh
Can Curry leaves be added to the batter?
Sharmilee J
yes you can
Meena Srinivasan
Hi. in the recipe details heading alone displays Garlic bread sticks recipe, pl check and correct it.
Meena Srinivasan
I like one more thing, the homely way of making with Paal packets covers, really it shows your simplicity and I feel, u r standing near and teaching the steps... such a thin, and crispy ones...
Shobha
I haven't tried anything with ragi as yet.. must try this for sure.
HAMMETHA
very useful recipe....
Radhika
Hi Sharmijee
Thanks for the recipe. Actually this recipe had slipped out of my mind though we enjoyed this a lot as kids. We always used to pat these rottis on plantain leaves and cook this on an iron tawa. I will cook this for my daughter tomorrow itself.
Radhika.
amali
I make ragi adai often. You recipe sounds good, for sure I am going to give it a try. Mine usually has drumstick leaves. Something about its smell adds extra flavor to the adai.
Meenal Ramanathan
I tried ragiadai.it was awesome . Similarly for making akki roti can we use hot water
anilaa
Hi sharmi .have been following ur cook and receive great applause from my family.ty sooo much !!and ragi roti has never came out so well for me..so I add lil atta . n will definitely try this !! Wish to give a small recipe of ragi... When u make ghee out of butter will get the residue known Kasadu... Let it remain in kadai with few spoons of ghee..to it add ragi flour and powdered sugar acc to ur taste.. Cook for 2 mins and tadaaa!!! Awesome sweet ragi .. My family members lovvvve this... Do try!! Ty
bhanu u
Very nice recipe. Never tried any thing with raagi.will try this tomorrow itself . Thank you soo much.
bhanu u
Never tried any thing before with raagi.thank you soo much.u always give awesome recipes