

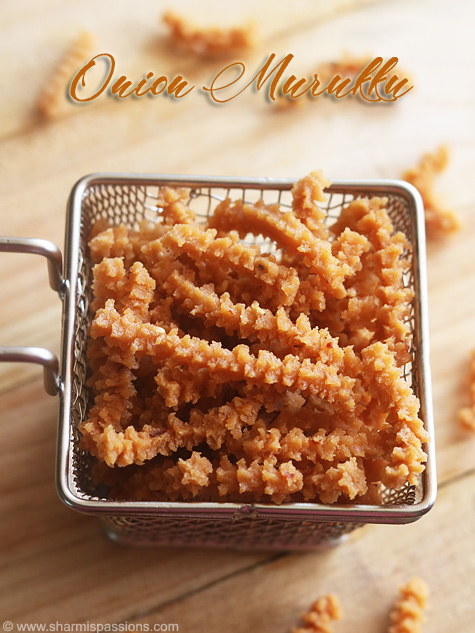
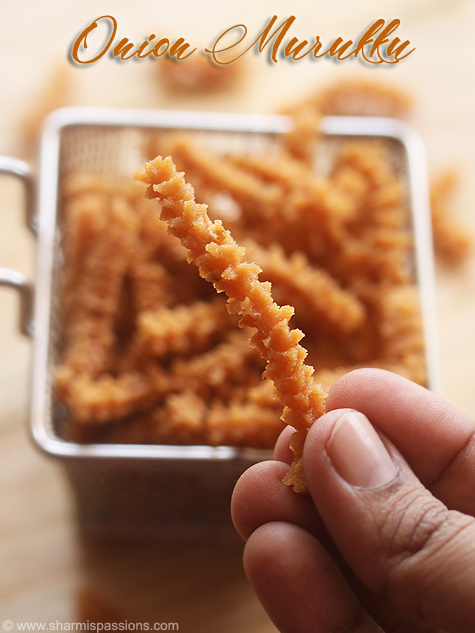
Onion Murukku is a crunchy, spicy murukku made by blending onion and chilli flavour in the making of regular murukku. It is commonly made at home for festivals and much healthier compared to packed snacks from store. Using small onion brings better flavour than big onion.
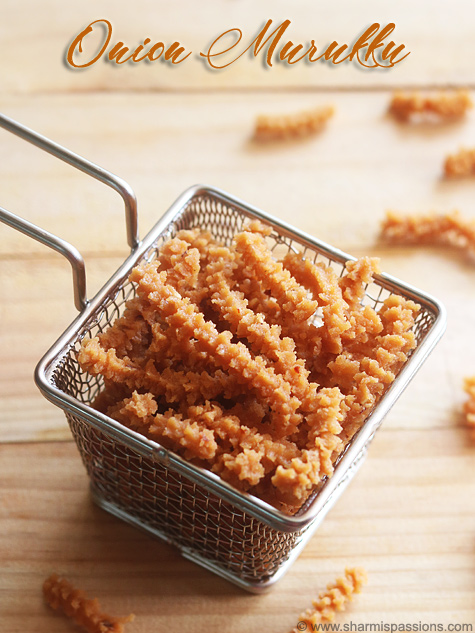
The flavour of small onions in this murukku is really good and makes it taste completely different from regular murukku. Once the dough comes together, you need to press and fry them quickly. It stays crisp for several days without losing that fresh taste.
Jump to:
About Onion Murukku
Onion Murukku is a flavourful variation to regular murukku. When you grind small onions into a paste, they have a mild, sweet flavour that blend beautifully with rice flour and urad dal flour. This combination give it a unique taste that make this snack stand out.
This murukku breaks easily since the dough is light and airy. It has golden brown colour, from frying at right temperature, and the texture is more delicate than plain murukku with onion paste. You get nice crunch outside but it is not heavy at all.
You can adjust spice level based on taste preference, some like more chillies and some prefer less heat. Also getting the right dough consistency is important, if too dry it is hard to press through the maker, if too wet it won't crisp up properly.
I wanted to try this for long time and every time I make it my family enjoy it too because flavour so fresh and nothing like store bought snack.
Similar Recipes
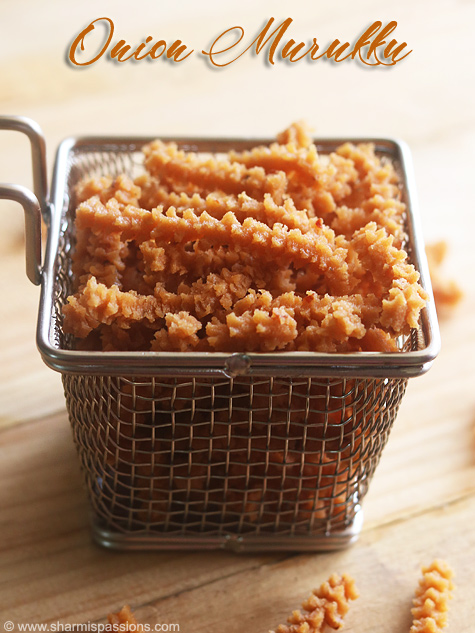
Onion Murukku Video
Onion Murukku Ingredients
- Rice Flour - I use rice flour as the base for light, crispy texture. It combines well with urad dal flour to give right texture when frying.
- Urad Dal Flour - This helps dough stay together and also add nice flavour. Urad dal flour is needed for binding everything.
- Small Onions - The flavour of small onion is really good in this murukku, so I strongly recommend small onion only. Big onion won't give same taste so choose small ones.
- Red Chillies - I grind red chillies with onion to add spice and flavour. Amount depend son how spicy you like your murukku to be.
- Sesame Seeds - I add these for crunch and flavour that spread throughout. They make each bite taste better.
- Melted Butter - Butter give richness to dough and make murukku taste more flavourful.
- Hot Oil - I add hot oil because it helps murukku come out crispy. This makes big difference in final texture.
- Hing - Just a pinch of hing for flavour and digestion help. Don't add too much.
- Salt - Season to your preference. Salt bring out flavour of all ingredients.
- Water - Add gradually to get smooth dough. You need just enough so it is not too dry or too wet.
How to make Onion Murukku Step by Step
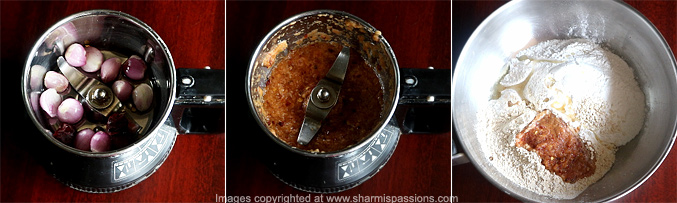
1.To a mixer jar add onion and red chillies grind it to a paste with little water. To a mixing bowl add rice flour,urad dal flour, sesame seeds, butter, oil and onion chilli paste.
2.Mix it well first then add water little by little. Gather to form a dough.
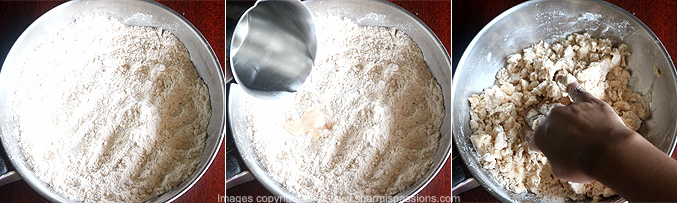
3.Gather to form a smooth dough. Grease the murukku maker with oil, place a star shaped murukku disc. You can use regular murukku plate too. Fill the murukku press with dough.
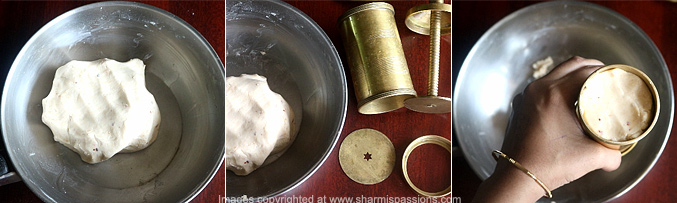
4.Heat oil in a kadai, when oil is hot enough press the murukku directly in hot oil. Let it cook for few seconds. Fry in low medium flame.
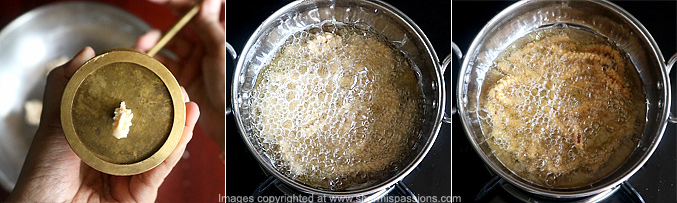
5.Flip over and cook till golden brown on both sides. When the bubbles ceases its done. Drain in tissue paper. Repeat to finish the dough.
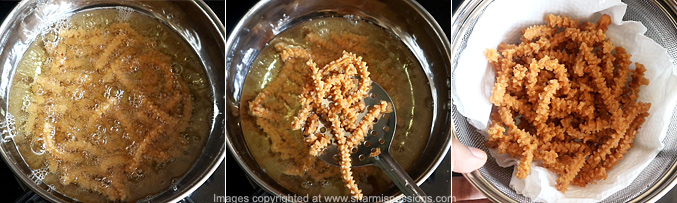
After cooling down store in airtight dry container.
Expert Tips
- Grinding Onion - I grind onion and red chillies together to a paste with little water. Grinding them together helps flavour blend nicely.
- Mixing Dough - Add all dry ingredients first, then add onion chilli paste and mix well. Only after that add water little by little.
- Getting Dough Right - Dough should be smooth enough to press through murukku maker but not too loose. This takes little practice to get right.
- Oil for Mould - I make sure to grease murukku maker properly with oil. This help sdough slide out easy when you press.
- Check Oil Heat - When you press murukku into oil, it should sizzle immediately. If oil not hot enough, murukku absorb oil and become heavy.
- Cook Both Sides - Press in hot oil for few seconds, then flip and cook till golden brown on other side. Don't leave one side too long or it burn.
- Spiciness - Adjust amount of red chillies based on your spice preference.
Serving and Storage
Serve Onion Murukku once it cools down a bit because thats when the flavour is best and texture is crisp. After completely cooling you can eat at room temperature too. Drain on tissue paper right after frying so excess oil come off, then store in dry airtight container. It stays good for several days as long as you keep away from moisture.
FAQS
1.Why must I use small onion?
Small onion has mild, sweet flavour that blends perfectly with murukku.
2.How do I make it less spicy?
You can reduce red chillies. Just start with less and taste, then add more if you want more heat.
3.Why is my murukku so oily?
If the oil is not hot enough, make sure oil is hot enough that it sizzles when frying murukku. If the dough is too loose also the murukku drinks oil.
4.Can I store it longer?
Store in airtight dry container and it stays good for several days. If it starts to soften, you can't make it crispy again so better to eat within few days.
5.How crispy should it be?
It should break easily when you bite and sound crispy. If it too soft then oil was not hot enough, if too hard then you cooked too long.
If you have any more questions about this Onion Murukku Recipe do mail me at sharmispassions@gmail.com. In addition, follow me on Instagram, Facebook, Pinterest, Youtube and Twitter .
Tried this Onion Murukku Recipe ? Do let me know how you liked it. Also tag us on Instagram @sharmispassions and hash tag it on #sharmispassions.
📖 Recipe Card
Onion Murukku Recipe
Ingredients
- 1 cup rice flour
- ¼ cup urad dal flour
- ½ teaspoon sesame seeds
- 1 teaspoon melted butter
- 1 teaspoon hot oil
- a pinch hing
- salt to taste
To grind to a paste:
- 12 nos small onion
- 3 nos red chillies
- ⅛ cup water
Instructions
- To a mixer jar add onion and red chillies grind it to a paste with little water. To a mixing bowl add rice flour, urad dal flour, sesame seeds, butter, oil and onion chilli paste.
- Mix it well first then add water little by little. Gather to form a dough.
- Grease the murukku maker with oil, place a star shaped murukku disc. You can use regular murukku plate too. Fill the murukku press with dough.
- Heat oil in a kadai, when oil is hot enough press the murukku directly in hot oil. Let it cook for few seconds.
- Flip over and cook till golden brown on both sides. Drain in tissue paper. Repeat to finish the dough.
- After cooling down store in airtight dry container & enjoy Onion Murukku!
Video
Notes
- Grinding Onion - I grind onion and red chillies together to a paste with little water. Grinding them together helps flavour blend nicely.
- Mixing Dough - Add all dry ingredients first, then add onion chilli paste and mix well. Only after that add water little by little.
- Getting Dough Right - Dough should be smooth enough to press through murukku maker but not too loose. This takes little practice to get right.
- Oil for Mould - I make sure to grease murukku maker properly with oil. This help sdough slide out easy when you press.
- Check Oil Heat - When you press murukku into oil, it should sizzle immediately. If oil not hot enough, murukku absorb oil and become heavy.
- Cook Both Sides - Press in hot oil for few seconds, then flip and cook till golden brown on other side. Don't leave one side too long or it burn.
- Spiciness - Adjust amount of red chillies based on your spice preference.

Mithila
Hi,
Can you pls tell me if this can be made with store bought idiyappam rice flour?
Thanks
Sharmilee J
yes
Mithila
Hi,
Can you pls tell me if i can use store bought idiyappam flour for this recipe?
Thanks
Sharmilee J
Yes