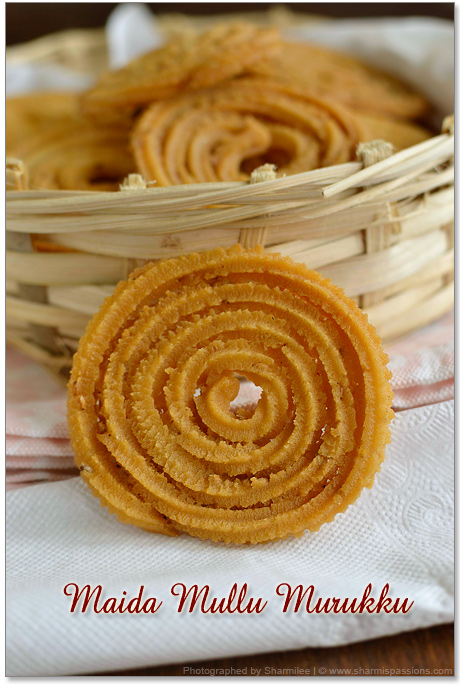
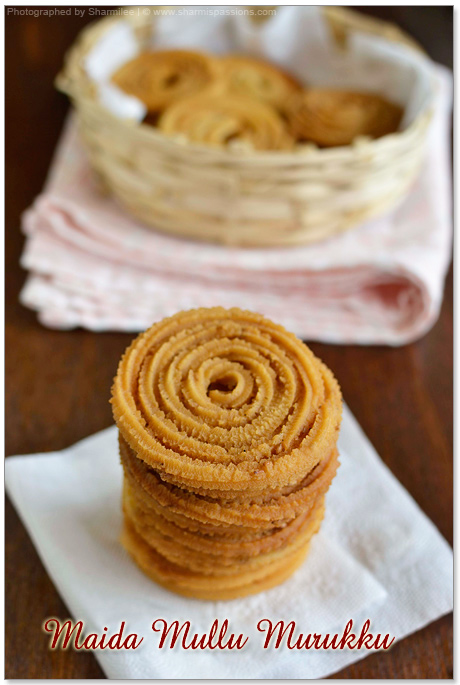
Mullu Murukku is a very easy murukku that you can try for Diwali. Mullu murukku is made using maida, butter, sesame seeds, salt and oil. Learn to make Mullu Murukku with step by step pictures for easy understanding and reference.

Mullu Murukku is traditionally made with rice flour and this is a twist to it by replacing rice flour with maida. Amma makes this murukku with ease and this is a perfect murukku recipe for beginners too. Do try and enjoy this crispy murukku!
Jump to:
About Mullu Murukku
Mullu Murukku is usually made with rice flour but this version with maida is my favorite. This recipe is from my mother who is an expert in making murkku varieties. If you can prepare the flour ready the previous day then making this murukku takes no time.
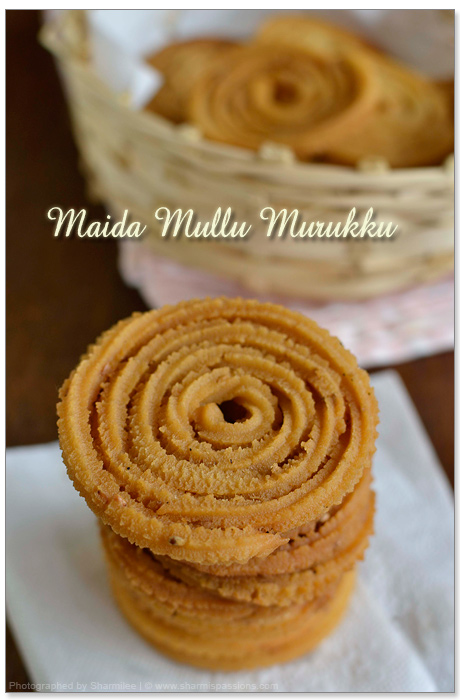
This Mullu Murukku is very easy and quick to make. This maida mullu murukku comes out super crisp and crunchy that everyone will love it. The main difference in using maida is the texture it gives to the murukku. I have made this murukku with so much ease so I would recommend trying it even if you are a first timer.
Similar Recipes
Mullu Murukku Ingredients
- Maida - You can either use homemade maida or store bought flour.
- Butter - Butter is added to give a melt in the mouth texture to the murukku.
- Sesame seeds - Sesame seeds adds flavor to the murukku.
- Salt - Salt is added to taste
How to make Mullu Murukku Step by Step
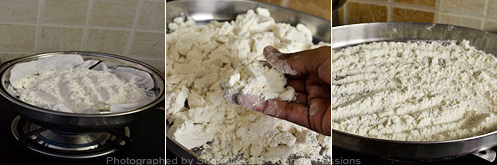
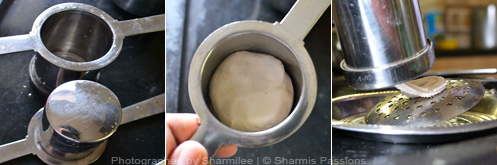
1.Steam cook maida for 10 minutes (I laid a white cloth inside the container then added the flour). After 10 minutes - When you take it, it will have lumps formed as shown. Cool down and break the lumps formed and spread it in a plate and leave it to cool down for 2 hours until it is completely dry.
2.Then sieve it and collect it in a container, now the flour for murukku is ready. You can even grind the coarse flour remaining and then sieve it again(I didn't grind it as most of them were sieved fine). In a mixing bowl, add maida, butter, sesame seeds, required salt and mix it once. Then add hot water and combine.
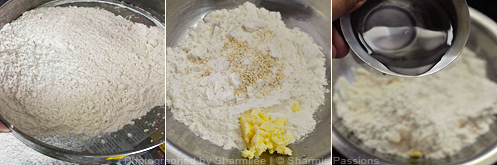
3.Combine to form a smooth dough. Then divide them equal portions and set aside. I used the star shaped press for the murukku.
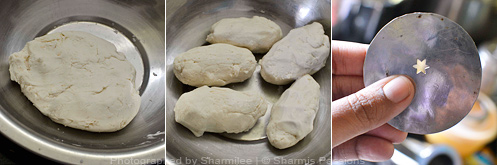
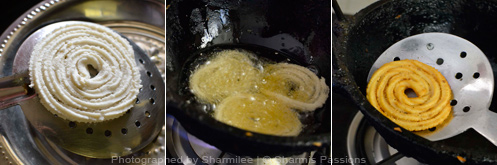
4.Grease the murukku press(it is like cookie press) and add the dough till it fills ½ to ¾th of the murukku press. Then press it circular to form a pattern.
5.Form a pattern like shown below at the back of a ladle(slightly grease it with oil). Heat oil in a kadai (as required for the murukku to immerse fully) - carefully flip the ladle and drop the murukku in oil. Cook the murukku on both sides till the 'shh' sounds ceases and they turn golden brown in color(Fry it in medium low flame.).Drain in tissue paper and then store in an airtight container.
You can store it in an airtight container for weeks and enjoy it.
Expert Tips
- You can also add a teaspoon of red chili powder if you prefer a spicy version.
- If you are planning to make in large batches then cover the remaining dough with a wet cloth until use else it will get dried up soon.
- If you are finding it difficult to break the lumps with your hands then you can give a pulse in grinder to break it but make sure to cool down and dry completely before you run it in the mixer.
- If you are not able to get the pattern correctly just press it like we do for thenkuzhal murukku.
- Once the oil is heated up, lower the flame and fry the murukkus in medium flame. After few batches, top up with more oil as it tends absorb quickly.
- I always press it in a ladle then drop as its easy to manage also the shape and pattern will be maintained. Pressing directly in oil is a little risky as we should able to bear the heat.
- I used white sesame seeds, you can use black also.
Serving and Storage
Mullu Murukku can be served as a snack with evening tea or coffee. Store in an airtight container to retain freshness. Need not refrigerate. Keeps well for about a month in room temperature itself.
If you have any more questions about this Mullu Murukku Recipe do mail me at sharmispassions@gmail.com. In addition, follow me on Instagram, Facebook, Pinterest, Youtube and Twitter .
Tried this Mullu Murukku Recipe ? Do let me know how you liked it. Also tag us on Instagram @sharmispassions and hash tag it on #sharmispassions.
📖 Recipe Card

Mullu Murukku Recipe
Ingredients
- 1 and ½ cups maida
- 2 teaspoon butter
- 1 and ½ teaspoon sesame seeds
- warm water as needed
- salt to taste
- oil to fry
Instructions
- Steam cook maida for 10 minutes (I laid a white cloth inside the container then added the flour). After 10 minutes - When you take it, it will have lumps formed as shown. Cool down and break the lumps formed and spread it in a plate and leave it to cool down for 2 hours until it is completely dry.
- Then sieve it and collect it in a container, now the flour for murukku is ready. You can even grind the coarse flour remaining and then sieve it again(I didn't grind it as most of them were sieved fine). In a mixing bowl, add maida, butter, sesame seeds, required salt and mix it once. Then add hot water and combine.
- Combine to form a smooth dough. Then divide them equal portions and set aside. I used the star shaped press for the murukku.
- Grease the murukku press(it is like cookie press) and add the dough till it fills ½ to ¾th of the murukku press. Then press it circular to form a pattern.
- Form a pattern like shown below at the back of a ladle(slightly grease it with oil). Heat oil in a kadai (as required for the murukku to immerse fully) - carefully flip the ladle and drop the murukku in oil. Cook the murukku on both sides till the 'shh' sounds ceases and they turn golden brown in color(Fry it in medium low flame.).Drain in tissue paper and then store in an airtight container.
- You can store it in an airtight container for weeks and enjoy it.


RAKS KITCHEN
perfectly done and great clarity in pics 🙂
Prathibha
Nicely done murukku..looks perfect n beautiful pictures sharmi
APARNARAJESHKUMAR
Perfect never knew we can prepare using maida
jeyashrisuresh
Perfect rounds sharmilee and they must melt in mouth for sure
Srilatha
Hi madam,
Instead of steaming maida flour shall I roast maida flour in kadai
Sharmilee J
No steaming will make the texture just like rice flour. So steaming can not be alternated.
GeethuSathiyaN
Wow....Lord Krishna wont leave ur home after seeing these yummy-crunchy murukku :)they look awesome and crafty 🙂 I hav tis one star acchu but i never used tat(basically i don hav tat much patience ;),i always used one with 3 holes or 4.this looks very perfect!!!Jus love them :)pls send a parcel to bangalore 😉
Premalatha Aravindhan
Perfect Murukku,loved the cute clicks...
Gauri
Crunchy and each one is just perfect!
Priti
Looks so perfect ..I want some
Nisa Homey
Crunchy murukku...perfect tea time snack.
Suja Manoj
Crunchy snack perfect perfect
Vimitha Anand
Amma makes this and love the super crunchy texture
Shweta in the Kitchen
So perfectly made Sharmilee. we call them chakli. I love them with Tea.
shwetainthekitchen.blogspot.com
M D
Oh these beauties... they look stunning! Happy Krishna Janmasthami!
Roshni
Perfect murukku.... beautiful clicks and description as always
Sobha Shyam
so perfect and crunchy, yum !
Shanthi
Looks yummy and nice clicks.
Chitra
looks perfect.Loved all the clicks. 🙂
Sushma Madhuchandra
My hubby's aunt makes this murukku. Loved the pictures!
Uma
Very perfectly prepared sharmi. Very nice clicks too.
Farah
Omg!!! Can the murrukkus look any better??? Super job sharmilee....
Madhu Pravin
wow! Amma used to make these for Krishna Jayanti too 🙂 love the clicks and it's absolutely a virtual treat!
Babitha costa
sharmi,i tried this today,but i didn't get the shape,it all spread out in oil.then i made some alteration and made paniyaram.Why so whats the mistake i
have done
dassana
these murukkus or chakli as we call them reminded me of my mom. she exactly makes like this. i just dread making these... considering they become crumbly or become hard.
you have managed to make them as well as look them perfect and beautiful. it is a great tip to make them first on the back of the ladle instead of making them directly in the oil.
Sharmilee! :)
@Babitha : The dough should not be very loose or very tight...it should be pilable. And if you press it in laddle and drop it in oil carefully(if the dough consistency is right) it will not spread out.
Mallika
Fascinating to see how Murukku is made. I had no idea you could attempt it at home!!
Reshmi Mahesh
Crispy yummy all time fav snack...Beautiful clicks..
Anamika Sharma
Lovely, real clear in your presentation how to make these, I always kept wondering how they come in perfect circle and now I have the answer 🙂
Madhavi
Great chakri...
indianspicemagic
Wounderful pics perfect murukku.
Devi P
Hello Sharmilee...hats off to ur site darling.....wud like to know if this maida mullu murukku can be made with besan(kadalamaavu)...please do tell me....as i feel maida is a little unhealthy.....the first recipe i tried was chinese veg fried rice and i was sooooo happy....allthe best to u...and please do reply to me....Devi
Sharmilee! :)
@Devi : This recipe cant be substituted with besan flour as maida has the tendency to act like rice flour when it is steamed....Check out thenkuzhal murukku which is made of rice and urad dhal flour.
Vaishnavi
Sharmi,
Could you please explain how to steam cook. I didn't get it. Should I just put maida in a cloth. Should I add water..Please explain.
Sharmilee! :)
@Vaishnavi : Just use ur idli cooker where we pour water at the bottom and above place our idli plates...Put maida over the idli plates and close it.Just cook it in the setup which is called steam cooking 🙂
Vaishnavi
Thanks Sharmi for the clear response 🙂
Priya Selvaraj
Hi sharmi,
2day I tried this it's really crunchy n melting in mouth, u knw my 2 yr old son never eat anything properly Wen I gv this muruku he ask me for more n ate. So tons of thanks. N yesterday I tried ur Vella sedai but it's lil hard outside, I am sure abt the measurements which u said. Can u pls tell me y?
SHARMILEE J
Good to hear that Priya....
Not sure what went wrong Priya for vella seedai...did you make the jaggery syrup thick? that might cause the hard outside...but not very sure
cafebaklava
These photos have been captured so well, it made me smile. I will give it a try. Beautiful an easy recipe.
rashmi raman
Thanks so much sharmilee i love ur recipe this one came out perfect